[00:00:00]
Okay, uh, let’s get started. So hi, everybody. I’m Mahashree, and I’ll be, uh, your host for today. So before we get started with the webinar, here are a few housekeeping items or session essentials that I’d like to cover. So firstly, all attendees will automatically be on mute throughout this, uh, entire course of this session.
In case you have any questions, do drop them in the Q&A tab at any time during the webinar. Our team is working in the back end, and they’ll be able to get back to you with the
[00:00:30]
answers via text. Now, if you have any, uh, technical glitches, you can let us know in the chat tab, and this is also where you can interact with fellow attendees and let us know where you’re joining from.
And finally, please do leave your feedback at the end of this session when you’ll be redirected to a feedback form. It will really help us improve our webinars going forward. So that said, let’s get started. So in this, over the next few minutes, we are going, uh, to look specifically at forms and how you
[00:01:00]
can neatly extract data from them.
Now, why forms? Because they are a fundamental document structural element that are– that is present across a range of documents and across various industries as well. So whether it is insurance claims, loan applications, patient intake forms, custom declarations, tax documents, you see them almost everywhere.
And in most of these places, they do contain the most important crux of the information that the document presents, which is why
[00:01:30]
it is extremely important that we ensure accuracy in extraction when it comes to forms especially. However, traditional extraction systems often face challenges with forms, which is why it has or it had been a difficulty all this while.
So now let’s take a look at what were some of the major challenges, uh, that were faced when extracting data from forms and how Elements are rapidly overcoming these challenges with the cutting-edge capabilities.
[00:02:00]
So firstly, we have template dependency and layout variations. Now, traditional OCR systems relied on fixed templates with predefined field coordinates.
So when a form’s layout changes, which was quite or which is still quite common, or even when it changes slightly, you receive different– a different version of the same document, and the system can easily break down because they are coded and they are very, uh, dependent on the original layout that was initially given to them.
[00:02:30]
Which means that you’d have to redesign these systems from scratch, which again means it is quite difficult to maintain. Secondly, handling visual noise. Now, scanned forms often come with skewed pages, shadows, coffee stains, background patterns, or even faded text. And all these elements add to visual noise.
So traditional systems struggle to see through this noise, and it often leads to misreads or failed extractions. But even these
[00:03:00]
challenges can today be overcome using Elements, and we’ll see how in the demo segment of the session. As a third point, we have inability to understand context. Traditional extraction systems don’t comprehend the meaning from documents.
They can read the documents and extract the text, but let’s say we’re dealing with a legal affidavit. So they can’t always tell the difference between an applicant name versus a witness name. So when this confusion comes into the picture, without
[00:03:30]
contextual understanding, data often ends up in the wrong fields or gets misclassified entirely, which again takes a big toll in downstream operations.
So these challenges are also overcome with Elements because Elements understand the actual context of your document rather than just extracting the text.
Number four, struggling with handwriting and mixed formats. So forms frequently contain handwritten text, especially when they’re filled in by hand, and it can
[00:04:00]
be printed along, uh, alongside check boxes, uh, or printed text, closely packed radio buttons, signatures, stamps, and so on. So traditional OCR, again, performs poorly on handwriting because it can’t handle this mix of formats in a single document, and sometimes the handwriting can be pretty difficult to understand.
As a final point when it comes to form extraction challenges, we have multi-column and complex structures. So forms with
[00:04:30]
multi-column layouts, nested tables, or overlapping sections confuse traditional systems. They follow a simple left to right or top to bottom reading pattern and can’t really navigate complex spatial relationships that are usually common with forms.
So this, again, causes fields to be read out of order or missed entirely. Now, that’s not a problem again for LLMs because, as I mentioned earlier, LLMs understand the context of your documents, and they also interpret documents exactly like how
[00:05:00]
humans do. So forms are designed to put together vast amounts of information in a concise format that is easy for humans to understand, which also works perfectly well for LLMs.
So now let’s see how you can actually deploy these LLMs in action, and for that, I’m going to take you through, um, a brief introduction of Unstract, what Unstract is all about, and this will be quick mostly, uh, for those of you that are new with us today, and we’ll then
[00:05:30]
move on into the demo segment. So Unstract is an LLM-powered unstructured data ETL platform.
Now, if I had to briefly talk about this platform, I can, um, split the capabilities into three key layers. That is the text extraction phase, and then comes the development phase and the deployment phase. Now, the text extraction phase is when you upload original documents and you extract the raw text from your documents in a format that is
[00:06:00]
LLM ready.
Now, this is extremely important because this LLM-ready format is what is going to enable your LLMs to work on your documents and actually extract accurate information. So h-how does this LLM-ready format look? This is done by actually preserving the original layout of your document because we’d earlier spoken about how LLMs understand, uh, context just like humans.
So the best way in which you can pass on information to LLMs is to actually preserve the original context.
[00:06:30]
So once this is taken care of, the development phase is pretty much, uh, easy to deploy, and this is, uh, a very important layer that we’ll be looking at. So Unstract, again, supports multiple text extraction tools natively within the platform itself.
However, a popular option that we see our users go for is LLMWhisperer, which is our in-house text extraction tool, and it’s also available as a standalone solution in case your needs stop at
[00:07:00]
text extraction and you have your own downstream operations, uh, following that. So once your raw text is extracted and once this layer is completed, you can now start defining prompts on your documents, which will basically specify two key criteria.
That is, what data are you looking to extract, and what is the schema of extraction that you’re looking for? So these are the two key criteria over here, and the third one is to actually ensure the accuracy of extraction. So all of this is taken
[00:07:30]
care of in the development phase, and in Unstract, we have a tool called Prompt Studio for this, where you can engineer prompts and, um, basically tell the system what kind of data to extract.
So the raw text that is extracted from your uploaded documents will be passed on, and these prompts are worked on using LLMs, and then you can also check the accuracy of, of the extracted output. So once you develop the prompts and you’re happy with how your data is being extracted, you can then deploy this
[00:08:00]
particular project as any of the following– uh, any of the, uh, deployment options that we natively offer.
So we have API deployments, ETL pipelines, task pipelines, human-in-the-loop deployments, and, uh, for certain advanced cases, we also have Unstract as well as any, uh, as well as LLM Whisperer as n8n nodes and also as MCP servers. So it really depends on what your needs are, and, uh, these are the different options that we offer.
Now, if I have to throw some numbers on the
[00:08:30]
platform today, Unstract has six point– over six point one K stars on GitHub. We have over one thousand plus member Slack community. And, uh, currently we’re also processing over ten million pages per month by paid users alone. So we’ll go into the demo, and we’ll also see how prompt, uh, engineering today can also be automated, because this is the major chunk of work that was generally put into, um, extraction using elements where you had to actually define prompts.
[00:09:00]
But with the agent capabilities we have, you can also actually completely automate this stage. So that is also something that we’ll be covering in the webinar today. So again, here are the different ways in which you can deploy the platform. So Unstract comes in three major editions. We have an open source edition for you to ex-explore the platform on your own, and, uh, this comes with a, a limited set of capabilities.
And again, you can, uh, deploy Unstract as a cloud or an on-prem version as well. LLM
[00:09:30]
Whisperer again comes in, uh, multiple ways in which you can deploy it. So we have the LLM Whisperer Playground. This is basically a free offering of the tool where you can access the end-to-end capabilities of the platform for free.
You can basically upload hundred pages onto the platform and, uh, see how LLMWhisperer is able to work or extract text from your specific business documents. So you can upload a hundred pages per, uh, per day for free. And, uh, if you want to go ahead with the paid version, you can
[00:10:00]
deploy it as an API, a Python client, a JavaScript client, or as I mentioned earlier, you can deploy it in your n8n workflows as well as, um, a-as an MCP server as well.
And again, uh, both the platforms are compliant with all the major regulations that we have lined up over here. So that said, let’s, uh, move into the demo segment. I’ll be taking you through the platforms, both LLMWhisperer as well as Unstract, and we’ll see how you can, uh, basically get started with extracting data from forms.
[00:10:30]
All right. So what you see over here is basically the LLMWhisperer playground that I was talking about. So, uh, this is where you can, uh, basically upload your documents. Just a minute
Yeah. So this is where you can basically upload your documents and you can extract data from them. Um, so I’m, I’m sorry, you can extract the te- raw text from them. So in this case, I’m going to upload a medical form,
[00:11:00]
um, over here, which has a bunch of, uh, radio buttons and line items, and you can see that some of them are filled in by hand, like the check marks.
And we also have some details that are entered in by the system. So this is a pretty complicated form to process since we have multiple check boxes packed closely together. We have, uh, multiple line items as well, and we have a table over here. So, uh, and we also have the signatures that are in a different, uh, font, uh, from the rest of the
[00:11:30]
document.
So this is basically how, um, LLMWhisperer extracts your text from the document. You can see that, uh, the check boxes are all extracted, and the ones that are checked are marked with an X. So this is, uh, how LLMs read which one, uh, of the boxes you have checked. And you can see that we have the various, um, pa- the patient’s name over here that is extracted, and you can see that the check boxes have been filled out for all the, uh,
[00:12:00]
places that I’ve checked.
So we have self under patient relationship to the insured, and we have checked single, which is also what, uh, we have, uh, checked as the patient status over here. And, um, you also have a signature that says Robert J. So if I have to search for that, we have that right here, and it’s in a different form, uh, font.
It is mostly… I mean, over here you can see it as a digital signature, but, um, mostly even if it’s handwritten, the system does its best, uh, to actually extract the raw text. And you can see that the
[00:12:30]
layout is basically preserved. So even the table over here is preserved, w- uh, you know, uh, based on the original layout, and this is basically the context that will be passed on to the LLM for, uh, data extraction.
So now that we’ve taken a look at one form, uh, I’ll also take you through some other documents, uh, before I go into Unstract and see how you can actually, you know, upload the extracted text and get started with data extraction
So over here,
[00:13:00]
uh, we have a loan application that I’ve uploaded. So this has some handwritten text as well. And again, we have certain, uh, checkboxes. And on the second page, I actually have an ID card scan, and you can see it is disoriented. So, uh, we’ll just give the platform a couple of seconds and, uh, we have it right here.
So the text has been extracted. So you can see the handwritten text over here, which is the, uh, borrower information. We have the checkboxes extracted, and
[00:13:30]
you can see that all the details entered in by hand are extracted again. Over here we have the current address, which is again a detail entered by hand.
And on the second page you saw that we had a disoriented ID card scan. So even if the orientation is, uh, not in the ideal way that you would want to present to your system, you can see how LLMWhisperer has been able to work on it, and you basically get an aligned version of this ID card with all the text, and this also
[00:14:00]
preserves the original layout.
So, uh, we have two pages extracted over here, and this is the context that will be sent to LLMs for downstream operations So you can actually go through various other pre-uploaded documents in LLMWhisperer right here. And, um, so we were talking about how sometimes these forms come with coffee stains or oil stains.
So we have a receipt over here. Although this is not a form, this does have an oil stain, and I just wanted to show you how the platform can actually work on
[00:14:30]
documents that are also, you know, pictures with bad lighting and, uh, not really clear. So if I were just passing this document that you see on the left to the LLM directly, it, it is going to be difficult for the LLM to extract data, even for the advanced models.
But if I actually, uh, you know, do this pre-processing where I, um, you know, add this layer of extracting the layout preserve text first, then this context is going to help the LLMs work better and also ensure better accuracy. So that is
[00:15:00]
basically what you can do, and you can also extract your, uh, forms with the, um, horizontal and vertical lines in-intact.
So for instance, over here we have a table with pretty, you know, condensed information. So if you just give it a couple of seconds, you can see how the system will actually extract the table with the, um, vertical and horizontal lines. So this is another parameter that you can enable on LLMWhisperer. It basically helps you pass on better context because,
[00:15:30]
um, I mean, LLMs would be able to get a, uh, idea of, you know, what text belongs where depending on the spatial relationship.
But if you actually have, uh, these demarcations, it becomes even more clear for the LLMs to understand the context of your documents. So that said, this is basically how you deploy LLMWhisperer, and, uh, I also have a Postman… Uh, I’ve also deployed it on Postman over here, where I’ve uploaded the same medical form that we’d seen first, and, uh, this is basically LLM, uh, Whisperer deployed as an
[00:16:00]
API.
And you can check the status of this, um, extraction. So, uh, you can see that the extraction has been successful, and here is the text that was retrieved. So this is the first document that you’d seen with multiple checkboxes, um, which were ticked, and, uh, we had a couple of signatures. So yeah, you can actually, um, you know, upload your own documents and see how this works for you.
Now let me move into Unstract, and, uh, I’ll take you through How you
[00:16:30]
can actually get started with data extraction from your forms. So what you see over here is the Unstract interface. We have, uh, the dashboard where you have a couple of, um, KPIs and, uh, trends on how, uh, you’ve been, you know, using the platform and how, uh, you’ve been processing your documents.
Now, if I were signing in for the first time, what I’d have to do is set up certain prerequisite connectors that I’ll require to get started with data extraction. Now, Unstract is an LLM, uh, powered platform, so you have to, uh, you know, connect with
Certain
[00:17:00]
LLMs, and we have all the popular options available in the market over here, and you can see that I’ve actually, you know, connected with a couple of them. And post that you have to set up certain vector DBs, embedding models, and finally text extractors. So if you are choosing to go with Unstract, uh, for data extraction, you also have LLMWhisperer as a text extractor over here that you can connect with, along with other options.
So, uh, as you can see, I’ve already
[00:17:30]
made… uh, you know, I’ve already integrated with a few connectors, and I’m good to go, and I can actually get started with, uh, prompt engineering or, uh, the, the text extraction phase is basically, uh, what we covered so far, and we can get into the development phase. Now, when it comes to the development phase, as I mentioned earlier, uh, we do this by engineering prompts that tell the system what data to extract and in what format, and to also ensure the accuracy of extraction.
So these are the three key components, and this was the, uh, main work that
[00:18:00]
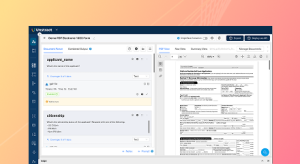
was involved when it came to prompt engineering. However, with the Agentic Prompt Studio, which is a fairly new release that we have, you can basically all you have to do is upload your documents, and the system itself will automate these three key operations in prompt engineering.
That is defining the schema of extraction, creating the prompt itself, and ensuring accuracy. So, um, we’ll see how you can do this by creating a new project and, um, yeah.
[00:18:30]
I… So you click on the New Pr- uh, Project button over here, and you basically enter the relevant details. So in this project, I’m actually going to be extracting some data from a rental application.
All right, so I’m creating this, um, project, and this is basically how the Agentic Prompt Studio looks. Now, the first step I’ll have to do over here is define
[00:19:00]
the LLMs that are going to be working on this project. So with this, um, uh, Agentic Prompt Studio, you actually have the flexibility of defining what LLM models you want, uh, to be working on what specific aspects of your extraction.
So for instance, over here I’m defining a model that would be working just for, you know, running the extraction prompts on documents, whereas I can go with a different model that would basically be creating or generating the prompts itself. So in this case, I just go for the previous one
00:19:30]
and, um, you have an LLM Whisperer connector for, uh, text extraction, and I can define a different lightweight LLM, which basically, um, you know, uh, performs lightweight tasks like generating prompt metadata.
So this is the kind of flexibility that you have, so you can, you know, really take into consideration the cost of your LLMs and the capability, uh, each LLM brings for you to, uh, you know, specify which ones, uh, you want to be working on which aspect of your document extraction. So once I
[00:20:00]
am happy, uh, and once I’ve set this, I’m going to save these settings and I can actually upload my documents.
So over here I’m uploading three rental applications Now, many times what happens is, um, landlords might collect these rental applications and send them to a third-party security or background screening company that basically takes a look at these applications and, you know, uh, gives a green signal on these applicants so that the landlords can go
[00:20:30]
ahead and, uh, you know, go ahead with the deal.
So that is basically where you might have this use case of, you know, processing multiple rental applications. And, uh, these are, again, they come as in the form of forms. So, uh, if I actually go into the, uh, Status tab, you have the various, um, capabilities or the various stages in the, uh, Agentic Prompt Studio through which you’ll have to run in order to get the final output.
So the first step, as I mentioned earlier, is to actually extract the raw text from
[00:21:00]
your documents. So that is what I’ve enabled over here. So you… I, I’ll quickly take you through the uploaded documents as well. So you have a rental application, which is a scan, and the details are filled in by hand. And you also have, uh, the finger over here that is scanned in.
It’s not a very clean scan, um, I would say. And, uh, the second rental application is actually a picture that has been uploaded, and you can see that the data is very closely packed and not, uh, very clear as well, which might be a huge, um,
[00:21:30]
obstacle for traditional OCR systems. And thirdly, the rental application over here is a pretty neat application.
So this is a digitally native document, and this shouldn’t be very difficult for the system to extract data from. So, uh, I’ve actually basically, you know, run the text extraction for all three documents, and you can see the raw text extracted over here. So this is the text that… This is the context that will be sent to the LLM for extraction.
So this is the digitally native rental application
[00:22:00]
that we saw. Uh, which one is this? This is the image. So you can see that all the details from the image have been captured and, uh, basically, uh, I mean, it’s pretty straightforward, right? Like, even if I send this particular image, it’s pretty difficult to read.
So when you first pre-process it and you extract the text, now this text is better readable, and the LLM can actually work on this.
And this is the first document that I’d gone through, and you have the extracted text over here.
[00:22:30]
So now that I’ve, uh, basically extracted the text from these, uh, documents, I can create… The ne-the next stage is when I, uh, you know, trigger the schema generation pipeline. So as I mentioned, the agentic prompt studio performs three main operations: schema generation, prompt creation, and accuracy.
Uh, accuracy, any, uh, you know, any ensuring accuracy. So, uh, the first stage is to actually generate your schema, and this is a multi-agent pipeline. The first stage in the schema generation
[00:23:00]
pipeline is to get a summary of each of the test documents. Now, what the summarizer agent does basically is it goes through each of these documents, and it identifies the important data fields, um, that needs to be extracted and what kind of data type are they, what structure should they follow ideally.
So it goes through each of the test documents and gives a summary for each of these documents. So you can view the summary over here. You can see that we have the name of the data field. We have a description. So what does this data field,
[00:23:30]
um, uh, mean, uh, for, uh, uh, for an extraction? So what is this, uh, all about?
What is the data type? And also, what is an example value that you might have? So you can see for property type, it gives you a description. It’s a type of rental property be– that is being applied for. The type would be a string, and examples would be a home or an apartment or a condo. So over here, we’ve given it as a home.
And, uh, similarly, we have the property address, street, city, state, zip code, property
[00:24:00]
bedroom, bathrooms, and so on. So this is for this particular, uh, document rental application one. I can look at the summary for the other two documents as well. And you can see that it, uh, the summary would slightly vary for each, um, of the test documents up, uh, you know, that have, that have been uploaded So once the summaries are ready, I’m good to go, and I can basically generate the schema.
So in schema generation, what happens is that the system
[00:24:30]
actually goes through all the summaries, and it puts them together. So, uh, this is the– this is a way in which you ensure that, you know, you do not leave out any use cases. Because all the rental applications that this particular business would get are going to be in different layouts and different formats.
They– Some of them might contain information that others do not contain. So when I have all the test variants in one place and I, you know, create a schema for that, the schema basically will account for all the documents, which basically helps me
[00:25:00]
generate a prompt, which wouldn’t… you know, which would minimize at least the number of edge cases I run into.
So, you know, you take into account all the, um, documents, and, uh, we’ll see how, uh, you know, the final output schema is. And another important thing that the system does while generating a schema is it also normalizes the data. So let’s say that in certain rental applications, we have the date coming in the format with the date first, followed by the month, whereas in some others, we might have the month first, followed by the
[00:25:30]
date.
So in these cases, you m– uh, I mean, that is not how you would ideally want, uh, your data to be stored in your system. So you can actually normalize the data, giving it a specific format to follow, and all of that is basically automatically taken care of with the, uh, schema generation. So we’ll give it a couple of minutes for it to finish
[00:26:00]
So meanwhile, I thought while, uh, you know, the gener… uh, schema generation, um, happens over there, I’ll take you through another Agentic Prompt Studio project that I have where I’ve actually, uh, already completed all the steps. So this will help you, you know, better understand how the overall out- output would look, because if we were to spend time on each of these stages individually, we might…
You know, we don’t have enough time, um, in this, uh, webinar if we have to cover everything. So, uh, we will take a look at an
[00:26:30]
existing project as well. So you can see over here in the Status tab that I’ve actually, you know, run through all the steps that are involved. So, um, we have the summaries of the test documents over here as well.
So these… In this particular project, I am extracting data from ACORD forms, which are very important for insurance use cases. So you can see we have three ACORD forms that we’ve uploaded over here. Their raw text has also been extracted, which has been sent to the LLMs for data extraction.
[00:27:00]
So I run the raw text.
You can see the output over here. The summaries are also available for each of the test ACORD forms that are uploaded And we’ve already generated the schema. It will be accessible under the Schema tab. So if I go into this, you can see that we have the, uh, elaborate schema over here. So as I mentioned, what the system has done is it’s combined all the summaries from the test documents that were uploaded, and we have the unified schema over here.
So again, we have the description of the
[00:27:30]
data field, the properties, the data type, as– along with examples. So this is how the overall, um, summary looks, and this is pretty lengthy, so because it needs to, uh, you know, account for all the edge cases. So this– Once you generate the schema for, uh, your project, you can use that schema to then automatically generate a detailed prompt.
Now let me just check. Okay, so the
[00:28:00]
schema is still being generated over here. All right. So we have it available now. So this is for the rental application, um, project that we’d looked at earlier. So you can see that we have a unified schema for this project as well. So, uh, we have the various, um, data types and the, you know, the data, uh, fields that we’re looking to extract.
So this detailed schema is what will be fed to the system while creating the prompt, and, uh, that is the next, uh, uh,
[00:28:30]
you know, uh, course of action. So I’m going to create the prompt over here, and this is again, another multi-agent pipeline that follows, um, a, that follows a very com– uh, uh, detailed approach to, you know, go through all the, uh, the entire schema and your summaries, and it creates a detailed prompt that accounts for all the edge cases, and we’ll see how it, uh, produces this prompt.
And you’ll, uh, actually get to see a seven-section prompt, so, uh, which has the details of
[00:29:00]
how to accommodate for, uh, edge cases, how to format your output data, and it g- it’ll literally give you output, uh, examples for each of the data fields and all of that in just a few minutes. So this is basically how you can, uh, save days and days of work and effort that was, you know, was initially put in manually by people.
So when you have to account for all the documents, prompt engineering was the area in document ex- in LLM-powered document extraction
[00:29:30]
that was most time-consuming. But we’ll see how it, you know, uh, is really brought down to just a few minutes with the Agentic Prompt Studio. So while we wait on this, I’ll take you through, uh, to the other project with the Accord, uh, form extraction that I have.
And we’ve already basically created an extraction prompt over here. So I told you that this is an elaborate seven-segment prompt, and, uh, we have the segments outlined over here. So we have a task overview, the output schema that is given over here along with the
[00:30:00]
data types.
And we have certain, um, pre-field extraction, uh, guidelines over here. So you basically have the data… I mean, the fields that you’re extracting. So it also gives you an idea of where you can typically find this in your document. So you have the location over here, what kind of keywords to actually look for, and, um, an example of the extraction.
So you have that for almost all your, um, data fields.
[00:30:30]
So that is how, uh, detailed your prompt is when it, when it gets generated. And you also have, you know, the output data types. So over here you can see that these are the different formats in which you can… you know, you could probably re- uh, receive your dates.
So over here we are preserving the date as is, and, uh, you can al- also edit your prompt. So I just have to click on Edit, and let’s say I don’t want to preserve it as is. I want it to follow a particular format. So let me say that
[00:31:00]
I, uh, want it to follow the format
Of month first, followed by the date, and then finally the year
Okay. So once I, you know, uh, change this, I can save this particular prompt and, uh, the Agentic Prompt Studio also supports versioning. So what you had seen earlier was version
[00:31:30]
one. Over here, I’m going to change this to version two. I can give it a short as well as a long description. Over here, I’m just putting in, uh, V2 as the, uh, detail, but let’s say that I actually make a dif- uh, a different change which is more substantial, then I can, you know, give it an elaborate description of w- how this prompt, uh, has evolved and what change this, you know, specifically entails and all of that over here.
So I’m just going to click on, uh, Save Version, and the system basically saves both the versions one and two so that I, you know, I
[00:32:00]
can easily revert to any of the versions in case I, uh, you know, have to do that. So… And I can also compare the different versions over here. So you can see we have the version one over here, version two on the, uh, right, and you can compare each one of them.
And the system also automatically highlights the exact areas where these two versions differ. So this is also how you, you know, have support for versioning and, um… Yeah, so going through the rest of the prompt, you have the
[00:32:30]
example output over here and, uh, as segment six, you have the edge cases and special situations that you need to account for.
And finally, you have the output instructions. So this is basically how, uh, you know, you generate an in-depth prompt in just a minutes. And this is, again, as I mentioned earlier, it’s going to save you days and days of work So over here we have the prompt generated for the rental application as well. And, uh, yeah, this
[00:33:00]
again has a, a pretty detailed prompt that was, you know, that has been generated, and it has seven segments.
So from this point onwards, I’m actually just going to go through the Accord forms, uh, to save time. So coming back to this project, once your, uh, extraction prompt is generated, what you would have to do is create a verified data set. So this plays a key role in ensuring the accuracy of your extraction output.
So what, uh, happens over here is that
[00:33:30]
you just basically enable, um, the extraction prompt that you’d created to run once on the, uh, on all the test documents that you’ve uploaded. So that’s what I’ve done over here, and you can see the output right here. So when I get into the Verified Data tab, you can see the extracted output for each of these test documents.
So I can change the documents over here, and you would see that the output differs. So what this stage offers me is an opportunity to create a golden data set. So, um, as a user, I
[00:34:00]
can… once I get the verified data from the extraction prompt, I can manually verify the output of each of these data fields with the uploaded test documents.
And if I have to make any corrections, I can easily just click on edit and make those corrections over here. So this en-ensures that I have a set of data where it’s been verified and, uh, the reason this is important is when we are maintaining these projects over time, you might have to add few components to your prompts or alter them.
And sometimes
[00:34:30]
what happens is when you alter a specific por- a, a different portion of your prompt or you add a new component, it might affect certain other components that you had not really thought of in the first place. So in order to basically control the entire output, even after making alterations to your prompt, you can always com– uh, you know, compare your extracted data with a verified data set, which has already been manually verified.
So this is how you ensure that your prompts are still working well, and it’s not breaking in, at any place.
[00:35:00]
So we have the ex– uh, verified data set over here, and, um, I can make any changes that I want. So for instance, over here, um, I mean, I’m, I’m not sure if, uh, this is an incorrect output, but just for the sake of this webinar, I’m, uh, removing the word services over here from the producer name, and I’m going to click on save.
So what happens is when I run the extraction, uh, prompt on the extracted, uh, on this particular document, it is going to, you know, uh, flag this
[00:35:30]
particular extraction because the, uh, extraction output is going to contain services, whereas I’ve just removed it in the verified data. So when I go back and I, um, basically run the extraction again
You would see how, uh, you know, I get the extracted output and, um, also how it affects the accuracy of each of the extracted, um,
[00:36:00]
I mean, each of the, uh, data extracted from all the documents. So I’ve basically changed, altered the verified data set and I’ve run the extraction again for each of the uploaded ACORD forms.
And you can see that we have an accuracy score for each of these documents. So it gives me an idea of how accurate each of my extraction has been, and we also have an overall project accuracy score over here. So let me, um, get, uh, you know, delve into this particular document where I’ve made that change.
So
[00:36:30]
you can see how, uh, what was the ex- you know, uh, you can a- basically look at the exact fields where an error has occurred. So, uh, this is what you’d seen earlier. So the verified data set contained the term services, whereas I removed it in the extraction and you can see that the system has automatically flagged this area, which is why the overall accuracy has also taken a hit.
So this is basically the only incorrect extraction from this particular document, whereas we have certain other incorrect extractions from other document as, uh,
[00:37:00]
other documents as well. So this is basically how you can look at, you know, whether you need to alter your prompt or, uh, what is the exact, um, problem behind your extractions.
So you have the accuracy scores over here that you can drill deeper into. And beyond that, you also have an analytics dashboard where you get an idea of key metrics like the total number of fields extracted, the overall accuracy, the number of failed fields, the top mismatched fields, and we also have a mismatch matrix.
So this gives you an bird’s eye
[00:37:30]
view of how each of, uh, you know, the data fields have been extracted from your documents
All right. So we have the different, uh, data fields over here, and we have the documents, and it’s also color-coded. So any, uh, data field that has been extracted inaccurately has… Uh, you can just click on it and drill deeper into this particular data. So you can view this as a field comparison in different, uh, uh, modes as well as the
[00:38:00]
data comparison and as a JSON comparison.
So this is basically how the Agentic Prompt Studio functions. And, um, it… Again, as I said earlier, you basically, um, automate the three key components of prompt engineering. That is schema definition, prompt creation, and finally ensuring accuracy. Now, this is the development phase. This is where I develop, uh, you know, uh, my prompts, and I see that it’s working well for the various, uh,
[00:38:30]
test documents that I upload.
Now, if I’m happy with this prompt, the final stage in the Agentic Prompt Studio would be to extract this project, uh, I mean, export this project as a tool. And once I export it as a tool, I can use that tool to create different deployments. So we have API deployments over here, ETL pipelines, task pipelines, as well as human-in-the-loop deployments, which are natively supported deployment options within the platform.
So you create them using workflows over here. Now, I’ve already created, uh, a
[00:39:00]
workflow for the Accord, uh, project, so let me just take you through that So this, uh, I mean, I’ve already created it to save time. So we have an ETL pipeline over here. So an API deployment basically gets your input documents, or in this case it would get the input Accord forms from an application.
It would, uh, process it using the Accord data extraction tool, and it would finally send the output data to another application. In this case, we’ve created an ETL pipeline where you get the incoming documents from a
[00:39:30]
file system, so it could be Google Drive or any other, uh, file system that you have. You process it using a specified tool, and in this case, we’ve specified the Accord data extraction, and you pass it on to a database or a data warehouse.
And you also have task pipelines where the incoming documents come in from a file system, you process it, and you send it back to another file system. And, uh, where human in the loop comes into the picture is, uh, when you’re, you know, defining an API deployment or an ETL pipeline, you can also add a layer of human in
[00:40:00]
the loop.
So you can see where, uh, you know, in this configuration I’ve specified what database I want to send the output data to. We have the table name over here and all the other details, and you also have a Human in the loop tab over here. So over here you can… In this case, I’ve just defined it as 100%. I wanna send 100% of my incoming documents to…
for human review. But let’s say I, uh, I’m dealing with thousands of documents on an everyday basis, so I’m not going to be able to go through all these thousand, uh, documents and perform human
[00:40:30]
review. So I can say maybe I want to, you know, just send 20% of the documents for human, uh, review, and what are the conditions?
So how do I decide which 20% go into human review? So for that, we have the rules over here. So I basically, I can filter out, uh, you know, based on the confidence score. So let’s say that the confidence score of a particular extraction was, uh, less than 0.6. In that case, then that particular document would be sent in for human review.
And we
[00:41:00]
can add certain other rules on top of this as well, and we have not, and, and, uh, or conditions that you can apply, and you can, uh, filter by value. So if it has a particular value, if the, uh, particular extraction, uh, name on the document was a certain name. So let’s say that the name of the particular extraction was Jake Smith, then I want this particular document to go into human review.
So you can, uh, you know, build these, uh, complex conditions on your own,
[00:41:30]
depending on your business needs. So in this case, I, uh, already run this particular workflow, and I will show you how the human, uh, review interface looks. So on the dashboard, we have the HITL, uh, uh, capability that you can access. So I’m gonna click on Review.
And over here I’m just going to basically fetch the document class that contains the documents that, uh, that, that would have been sent for review once I’d run that workflow
[00:42:00]
So we have the ACORD data review over here. So now I’m going to fetch my documents, and basically you see, uh, all the extracted output for each of the ACORD forms. So, uh, this document was fetched from the, uh, Google Drive connector that I had configured a connection with. And you can see that the system automatically highlights certain, um, output…
I, I mean, out-output fields which have a lower confidence score than the rest. So I can just click on any
[00:42:30]
of these outputs, and the system also automatically highlights where that particular output was fetched from, uh, from the original document. And not only that, I can also, uh, edit the output. So for instance, uh, let’s say that I want to change the contact name.
So I’m just going to click on this. I’m gonna double-click on the output type, and I can easily change the name over here. So I can change the last, uh, name to Scott, and that’s how easy it
[00:43:00]
So you can look at it under, uh, the queue details, so you can see how many documents you have pending, how many are review in progress, how many you finished. And then once you finish your document, it goes into an approval, uh, review interface where you can approve the documents and finally, um, you know, send it into the database or the relevant destination.
[00:43:30]
So when I finish this doc– uh, finish, you know, reviewing this document, it will go into the approval wor- approvers workflow
All right. So this is, uh, the approver’s workflow that I’ve entered. So the interface is very, you know, similar to the human– uh, I mean, the reviewer workflow, uh, itself. So I have the core data review over here, and I’m going to fetch the, um, document.
[00:44:00]
So I can just click on Approve, and this is basically how I send that particular document into the, uh, database.
And in case I want to make any changes to that particular document, I can also do that because I have the, um, ability to, uh, perform the same source doc, uh, source document highlighting and editing of data in the approver’s workflow as well. All right. So this is basically how I can keep fet– uh, clicking on Fetch next and, you know, fetch the next documents from this particular, uh, folder
[00:44:30]
in my file system.
So with that, we’ve actually taken a look at how you can extract data that is layout preserved from your forms, how you can create a, a project which, uh, using the Agentic Prompt Studio, which allows you to automate, uh, major portions of prompt engineering. And finally, how you can ex– you know, ensure accuracy with the various verification capabilities within the Agentic Prompt Studio itself and the human review, uh, workflows where– that you can manually, uh,
[00:45:00]
perform a human review of…
I mean, using which you can perform a manual check. So, uh, with that, we’ve actually concluded how, you know, you can form, uh, how you can extract clean data from messy forms. And let me go back to the presentation. So that brings us to the conclusion of this webinar, folks. And, um, in case you want to try out these capabilities on your particular forms or any other documents for, um, for that matter, you can try, uh, you,
[00:45:30]
you, you can sign up for a free Unstract or LLMWhisperer, uh, trial period.
You have LLMWhisperer playground where you can, you know, upload hundred pages for free every day. Or another common way in which we, uh, you know, have our customers, um, learn about Unstract is to actually sign up for a free one-on-one demo where you can sit with one of our experts, and we’ll be able to take a look at your specific documents, see how you can customize Unstract for your needs, and take it forward.
So, uh, the links to all of these, uh, whether it’s
[00:46:00]
the free, uh, trial or the demo and certain other helpful links, uh, you c- uh, will be dropped in chat, and you can get it from there. So that said, we are now moving on into the Q&A segment in case you have any questions.
[00:46:30]
Okay, we’ll just wait for a minute or two, uh, in case… I’ll just give you time to enter the questions, and in case we don’t have any other questions pending, we can, um, end the session
[00:47:00]
Okay, so, um, thank you everybody for joining
[00:47:30]
this webinar. Uh, it was great having you here and, uh, hope to see- hoping to see you at our future events as well. Thank you so much!
See Unstract in action with walkthroughs of core features and real extraction workflows.
Managed cloud, on-premise, or open-source. Unstract adapts to your infrastructure needs, so choose what works best for you.

Prompt engineering Interface for Document Extraction

Prompt engineering Interface for Document Extraction

Make LLM-extracted data accurate and reliable

Use MCP to integrate Unstract with your existing stack

Control and trust, backed by human verification

Make LLM-extracted data accurate and reliable




Spreadsheet data extraction: Handling multi-tab, multi-format files & more