[00:00:00]
All right, let’s go. So, hey, everybody. I’m Mahashree, Product Marketing Specialist at Unstract, and I’ll be your host today. This session is focused on a very niche topic in document extraction, that is data enrichment. Now, the format in which you get data from your documents is not always the format in which you may need it to store it in your business systems.
For instance, let’s take invoices. So you’re gonna have multiple data fields in an invoice. You could have the vendor
[00:00:30]
details, the date, the invoice line items, and so on. Now, for a field like the date, it can come in multiple formats. But you might want to store it in your destination system only in a specific format.
So you could have alphanumerical representation, you could have the date first, uh, followed by the month, or the month first, followed by the date. But when you want to unify all these formats and hold one format for your particular business, that’s where data enrichment comes into the picture. So data enrichment, what it, uh, primarily does is
[00:01:00]
it takes the extracted data, and it applies a certain logic on it to format it into the desired format that you want before sending it down to the destination system.
And that is exactly what we’re going to be discussing over the course of this webinar. We’re gonna see what it is and how you can do this. Now, the example I just took is very simple, but in actual practice, it gets a lot more complicated than that.
So here’s everything that we’ll be covering in this session. We’ll start by looking at
[00:01:30]
where data enrichment breaks today. So in this, we’ll take a look at how, uh, we are handling data enrichment currently, what are the conventional methods, and we’ll also look at what are their shortcomings, because it is these shortcomings that are actually pulling back data enrichment and which are actually opening up the space for a tool like Lookups to come into the picture.
We’ll then, after we cover the, uh, shortcomings of data enrichment and where it stands today, we’ll move into introducing Unstract’s Lookups, and this is an inline data
[00:02:00]
enrichment feature that the platform has right now. So we’ll take a look at what it is all about, and this will also be supported, uh, with a live demo segment where we’ll set up a lookup, and we’ll also take a look at certain real-world use cases.
The webinar will finally close with an interactive Q&A with our experts where you can ask any questions, and we’ll be able to answer them live on air. So that said, let’s get started by looking at what are the current approaches for data enrichment. So currently there are two major ways in which
[00:02:30]
this can be done.
Firstly, there is the external post-processing, and next we have in-prompt enrichment. Now, external post-processing means once you extract the document data, you send it to an external code, which is hosted separately, and over here you apply the, um, enrichment logic, and you change it in your desired format and then route it to the destination.
Whereas in the in-prompt enrichment, this is more particular to data… uh, I mean, document extraction pipelines that are deploying
[00:03:00]
LLMs. So when you deploy LLM for document extraction, you’re going to give the system a prompt which specifies what data you’re going to extract and what is the schema of extraction.
So with the in-prompt enrichment, you’re going to add a third aspect to your prompt that is basically the logic that you’re going to follow for enriching your extracted data. So these are the two current approaches that we see predominantly being used, and of course, they come with their own shortcomings.
So let’s take a look at what they are. So firstly, we’ll take a look
[00:03:30]
at the post-processing, uh, methods, shortcomings, or limitations. Now, one of the biggest shortcoming is the dependency of post-processing on the engineering or IT teams. So every change in enrichment after once you set it up requires you to go through a development cycle instead of it, uh, being a quick configuration fix, because even for simple fixes, you’ll have to contact the IT team, and they would take some time to respond and work on the actual fix, and this could easily take you,
[00:04:00]
uh, days or even weeks of time.
Secondly, with post-processing systems, it is harder to debug. Extraction and enrichment run on separate systems, so tracing an error means you’ll have to jump between two disconnected places, and this could again bring some hassle into the process. So you would ideally have to move into a system where you have everything under one hood.
And finally, there is no built-in versioning. Now, when we are looking to perform data enrichment, it’s not like the logic is going to stay the same all the
[00:04:30]
time. With evolving business needs, the logic is also going to have to evolve. However, when you have the external code, one thing blocking is the IT team that you’ll have to pass through every single time.
The second aspect is that most of the time, these codes, uh, that you’re hosting separately cannot be rolled back. So there is no version control that is present over here, which means that you’ll have to be extremely cautious before touching the code, and that is something that, uh, a feature like Lookup can help you out of because with the Lookup,
[00:05:00]
you have the space to experiment with your data enrichment before you finally make the changes and implement it across your business So that said, we’ll move on into the limitations of in-prompt enrichment.
So as I mentioned, in, with in-prompt enrichment, you’re basically hard coding the instructions for data enrichment in your extraction prompt itself. So over, uh, over the course of time, this could make the prompt get overloaded or brittle in nature, and this also means that it’s harder to
[00:05:30]
isolate errors, because one- when something breaks in your extraction, it becomes difficult to tell which instruction in, in a very long prompt has exactly caused it.
And again, in-prompt enrichments are not built for structured logic. So with, uh, data enrichment, you are not just working with the extracted data. Sometimes you would need to refer to reference files, it could be a PDF or a CSV with certain other values that your system has, and you would have to, uh, factor in those values while making the enrichment.
So with the,
[00:06:00]
uh, extraction prompt, the only way out is to actually enter these values into the prompt itself. And again, that makes it extremely long and brittle and difficult to handle. So fundamentally, what we are seeing with post-processing and in-prompt enrichment is that they are completely, uh, two different ends of the problem.
So with the post-processing, it is completely out of the, uh, document extraction system, which makes it extremely hard to access. Whereas with the in-prompt enrichment, you have the logic fused together with the
[00:06:30]
extraction prompt itself. So it is very difficult to differentiate the two. Both these extremes come with their own limitations, as we’ve just seen, and the ideal solution would be to actually create a composable architecture where the enrichment layer stays within the document extraction pipeline so that it’s accessible, but not outside of the ex- but also outside of the extraction unit.
So while it is within the pipeline, it should also stay outside of the extraction unit so that it’s also easy to maintain
[00:07:00]
and scale accordingly. And that is why with Unstract we’re now introducing Lookups. So we’ll now take a look at Lookups and, um, as I mentioned, this is an in-line data enrichment, uh, capability that we now have or a layer that we’ve added.
So you can see in this architecture diagram itself that once you get the document ingestion from the source, you send it for data extraction into the platform. Earlier, you would have to send it outside of the document extraction pipeline, which is being represented by the dotted line. But
[00:07:30]
right now we have the enrichment layer available within the extraction pipeline itself, so you can access this or not depending on your use case and then send the, like, um, enriched output data to the destination DB.
So this is the architecture that we have now implemented with, uh, Lookups. So that said, here are also certain other key, uh, features of the, uh, the lookup that I wanted to go over. So firstly, this is prompt-based, so it’s completely, uh, easy to, uh, you know, enter your
[00:08:00]
instructions, and it has democratized data enrichment to a very large extent.
And it also supports reference files, so you can upload any other external files or resources that you will need for the enrichment of a particular value. And it also comes with versioning or version control, so you can maintain two different versions of the logic that you want for enrichment and roll back at any time as well.
And it also, again, comes with certain safe failure handling methods so that you are able to spot errors early on, and you do not let it run down into your downstream operations.
[00:08:30]
So that said, let me move into Unstract. And for those of you that are completely new, Unstract is an agentic AI document processing and extraction platform.
So I’ll now move into the, uh, platform, and I’ll first take you through a quick tour of what you can do with the platform before we move on and cover how you can set up a lookup
So here is the, uh, Unstract platform. I hope you can see my screen
[00:09:00]
Uh, is my screen visible, Soundarya? Uh, no, Mahashree. The platform is not visible yet. Okay, just a minute
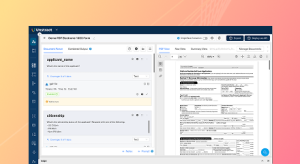
Is it visible now? Yes Okay, thank you. So, uh, as you can see, this is the Unstract interface. So, uh, what you have over here is the dashboard, and this is the screen you’d see when you log in. And this gives
[00:09:30]
me an idea of how I have been using the platform. So we have certain k- key metrics like the pages processed, the number of documents processed, the failed pages, number of LLM calls, and all of that over here.
And below that, we also have certain useful trends that might be, uh, helpful for you to see how you’ve been using the platform. So when you actually enter the platform, well, how Unstruct works is that you would… Once you upload the document into the platform, the first step that is done in the platform is to actually extract the raw text from your document.
This is done
[00:10:00]
using a text extractor tool that you’ll have to integrate with, and you can find it under the settings panel over here. So why do we need a text extractor? Now, there are various kinds of documents. You could have scanned documents, you could have digitally native documents, and especially with these scanned documents, a common problem we see is that you could have bad scans, you could have bad lighting, you could have noisy scans, or you could have certain handwritten text in it.
So there are various kinds of documents that come in, uh, for extraction. And even the advanced models, LLM
[00:10:30]
models that we have today are sometimes not equipped to handle these different variations. So that is why we pass the, uh, uploaded document through a pre-processing layer that is powered by the text extractor.
And what this does is it prepares the document in a format that is best consumable by the LLM. So how this does is it basically, uh, how this does it is basically it takes the raw text from the original document while preserving the original layout. Now, why is layout preservation
[00:11:00]
important? Because LLMs consume information very much similar to how humans would.
So the best way in which you can pass the entire context of your document is to actually preserve the, uh, original, uh, layout of the document that it came in. So we have multiple text extractors that you can integrate with, and you can see that we also have a couple of LLMWhisperer connectors. Now, this has been one of our popular choices among our users.
It is Unstract’s in-house text extractor tool. It goes very, uh, well hand-in-hand with, uh, Unstract. And, uh,
[00:11:30]
because it’s also known for its powerful layout preservation capabilities, LLMWhisperer is also available as a standalone solution. So you can access it over here in the dropdown and explore this, but, uh, in this webinar, I’ll be moving on.
So once you pass the document through the, uh, text extraction phase, you can then upload your prompts and see how, uh, the prompts are actually working on the document and how your data is being extracted. So for that to work out, you’ll have to again integrate with certain other connectors. We have
[00:12:00]
LLMs over here, vector DBs, and embedding models.
So, uh, as I mentioned, I mean, Unstract is LLM-driven, so we have all the popular models out here, and you can integrate with any of them. You can see that I’ve already set up cert- a number of connections over here. So once you set up the connectors with the LLMs, vector DBs, and embedding models, you’re good to go, and you can finally get started So what happens now is you can start entering your prompts in our prompt engineering environment called Prompt Studio.
So I’ll be creating a new project
[00:12:30]
today where I will also be setting up a lookup. So in this project, the use case that I’m going to take is again the invoice use case that we had spoken about. So we are going to be uploading a bunch of invoices in different layouts and formats, and we are going to see how we can use the lookup to, uh, actually enrich the extracted data.
So let me create this project, and I’m going to give it a project name
I’ll have to also give it an author name
[00:13:00]
Now I can choose to give it a more, uh, descriptive, uh, description or brief over here, but I’m just going to put the project name itself for now, and let me create this project
So what I have over here is the Prompt Studio interface, and the first step for you to do is to actually choose which one of your LLMs embedding model vector DB and text extractor are actually going to be working on this particular project. So we’ve seen that we can actually integrate with a bunch of
[00:13:30]
them.
So I can choose… We can choose from any of the LLMs that I’ve connected with and have the combination that I want. So this is available under Settings, and under Settings, you again have a bunch of capabilities. I’ll come back to this if we have time at the end of Prompt Studio. So right now, once I im- uh, you know, decide my LLM profile, which is basically the combination of connectors that I’m going to be using, let me upload the documents for this particular project
[00:14:00]
So I’m going to be uploading a bunch of invoices
All right. So let me perform the first, uh, course of action that is actually the text extraction. So once I click on this button over here under the actions column, what happens is it deploys the chosen text extractor connector that I have for this project to extract the raw text in a layout preserved format.
Let’s take a look at how this looks
[00:14:30]
So you see the original document over here. We have a PDF, and when I click on the raw view, we have the extracted text while the layout is also preserved. So this is basically the context that the LLM will be using to, uh, perform data extraction further. So I’ll also go through the other documents that I have so you have an idea of what are the invoices that we’ve uploaded.
So we have another invoice over here, and we have the text extracted
[00:15:00]
And the fourth invoice actually has, uh, Arabic as well. So this is a multilingual document, and you can see that this has also been extracted pretty well with the layout intact. So once the text extraction is done, I can create the prompts, and my prompts are basically going to tell, uh, my system what data to extract and what is the format that I need to use or what schema I need to use for the extraction.
Now, for the want of time in this particular, uh, session, I’ve already created the prompts, and let me just copy-paste it for you so you have an idea.
[00:15:30]
And once I paste the prompt… For instance, this particular prompt, I can give it a prompt, uh, name, as well as the description. And in the description, you can see that I’ve specified that this is going to extract the invoice number, date of issue, due date, vendor name, as well as the buyer name.
So this is just extracting the top level general details from this particular invoice. Once I enter the prompt, I can decide which, uh, data type to go with for the extraction output. So I’m going to click on JSON over here, and let me also create another
[00:16:00]
prompt
So in this prompt, we are extracting the line items from the particular invoice. So we are extracting the description, the quantity, unit price, as well as the amount. So I… And again, I’ll, uh, choose JSON for the output type over here as well. Now if I run this prompt, you will see that it basically gets the output across all these invoices.
Once, uh, the output is available, we’ll see how you can actually,
[00:16:30]
uh, set up the lookup and what is the use case that we’re going for. So over here, you can see that I have the invoice number, the, uh, date of issue, as well as the vendor name. And certain fields, if they’re not available, would just be given as a null value.
And over here you can see that even the Arabic values have been extracted for the description. So, uh, over here you can see that, uh, the date is given in this particular format where I have an alpha numerical representation. Now let’s say that I want to go with the Indian standard of representing the date,
[00:17:00]
which is basically having the date first, followed by the month, and then the year.
So for me to apply this logic, for me to extra… uh, enrich the, uh, dates that I’ve extracted, that is the date of issue and, uh, the due date, I’m going to create a lookup over here. So I’ll first have to click on the hamburger icon that you see on top, and this gives you the option to create or enable, uh, the lookup.
So, uh, I mean, Unstract also supports a post-processing webhook, but this is the, um, alternative, the better alternative I would say
[00:17:30]
that you could go for. So once I click on Lookup, we can configure it
So, uh, the first, first the system asks me if I want to go with any of the existing lookups or I wanna create a new lookup. So in this case, I’m going to create a new one and give it a name
So
[00:18:00]
this is basically how the configuration setup looks. So we have the, um, variable for this particular prompt. So through this, uh, by mentioning this variable in my prompt, which I’ll have to enter to specify how to, uh, you know, enrich my data, I can access the extracted values in that particular prompt from the uploaded documents.
So this is the variable reference that I’ll have to be using in the prompt. Now let me also, uh, you know, uh, upload the prompt over here. So I have that created. I’ll take you through this prompt
[00:18:30]
once I paste it over here. So I can also, you know, choose which LLM model I want to run for this particular, uh, enrichment.
And this prompt, as you can see, specifies how to actually format the date. So, uh, I’ll just read it out for you. “You are a data transformation assistant. Your task is to take an extracted date from the invoice and convert it into the standard Indian date format, that is the day, month, and then followed by the year.”
So we’re working on the due date and the date of issue extracted from this particular variable,
[00:19:00]
which is what, uh, this prompt, uh, out… This is basically this prompt’s output. And under the instruction, we are giving that it needs to pass the provided date to identify the day, month, and year, and we are converting it from, uh, text or any other format to a two-digit number.
So we have also given an example, so from July would become nought 7, and we are again reformatting the date, and we finally have the, um, exact format that’s also given explicitly over here. So once I do this, I can now test the lookup, and I can, uh, run it
[00:19:30]
over here for you So the test lookup feature basically gives you an idea of how this, uh, value is likely to, uh, come out
All right. So once you test the lookup, you can also add any… I mean, the reference file is another, uh, option that you have over here for the lookup. So in case… I mean, this particular use case does not require a reference file.
[00:20:00]
However, in certain other use cases that we’ll see subsequently in this session, you might want to refer to an external resource.
So for that, you would have the, uh, reference file given over here. And, um, once I click on Save Lookup, this saves this as the, uh, first version or V1. I can also change the name of this version accordingly, and here I have it saved. So you can see that actually when I ran the test lookup, I did not get a result over here.
That’s because there is something wrong with my prompt, and I’ll have to go into it
[00:20:30]
and sort that out. So, uh, let me check that over here So you can see the problem is that I have a variable name that’s given for me to access the extracted output from this particular prompt, but the variable name given over here is completely different.
So this is the error that was spotted, and I have that error out here, uh, that’s given over here. So let me just copy this variable and paste it over here so we have the right extraction
[00:21:00]
So once this is done, I will have to click on Save Lookup, and this saves this as version two. So now when I run the, um, test lookup, we should be able to get the results
So you
[00:21:30]
can see that it’s also given us an example of how it would convert the value. So if the date is given in a particular format, it’s basically formatting it into the value that we want. So now that this is available, uh, we also have version control over here. So we have version one as well as version two.
So I can roll back to a different version at any point in time, depending on how I want to change, uh, the logic for this particular enrichment. So now that this particular lookup is set up, uh, let me go and run this prompt again, and you
[00:22:00]
would see how, um, we are also able to get an enriched value with the, uh, changes updated
All right. So we have the raw view, which is basically the
[00:22:30]
invoice number, the date of issue, the due date, and the vendor name. And you can see in the date of issue we have the alphanumerical representation. You can see that under the enriched value I have the date that is formatted according to my needs.
So this is what’s possible with the lookup. So I can actually explore any other document, and you’d be able to see how the date is actually enriched. So in the raw view you can see that the, uh, the extracted date is exactly in the format in which it’s available in the document. However, with the enriched values over here, this ha- this has been
[00:23:00]
formatted according to my needs.
So the raw view is actually present over here as, uh, an error catching or a failure, uh, handling, uh, feature, because sometimes when your lookup does not work, uh, the enriched value shouldn’t come in the way of your downstream operation, so it shouldn’t affect the other extraction outcomes that you have.
So in order to handle such failures, we have the raw view that is always available, so you can take this data for downstream operations and, uh, go ahead with your, uh, data processing.
[00:23:30]
So this is basically how you set up lookups and, uh, now we’ll move on into certain more advanced use cases where we are having reference, uh, do- uh, reference files that we’ve uploaded as well.
So lookups are also again available as a central repository. So this is basically, uh, where you define… You can also create a lookup over here, uh, by clicking on New Lookup. And basically the lookups that you have over here can be used across any project. So especially for this particular use case, which is
[00:24:00]
the date formatting, we have it over here.
So this is pretty common. You might want this exact enrichment to happen across multiple document extractions. So in these cases, you can use this from this repository, and you do not have to, uh, set up the lookup right from scratch. Uh, you can just take it from here, plug it in, and you’re good to go. So that said, let me move back into the project, and we’ll explore another, uh, use case today, the resume extractor
[00:24:30]
So in this project, we have a bunch of resumes that I’ve uploaded, and we are extracting key details like the contact and personal information, the work informa- uh, the work experience, educational details, as well as the skills and so on. Now, I’d like to bring your attention to the educational details that I’ve ex- uh, extracted over here.
So we are extracting the institution name, the degree, the field of study, the GPA, the start year, and end year. And one common observation across many resumes, and you might have seen, is
[00:25:00]
that the degrees are usually represented in the abbreviated format. For instance, over here, even in this particular resume, we have the degree given as BFA Photography and not as Bachelor of, um, Fine Arts.
So that is exactly how the degree has been extracted, just like it is present in the resume given over here. But maybe my business requirement, um, wants that this abbreviation is e- uh, expanded into the full form. So for… That is exactly what I’ve set up this lookup for, and we’ll take a look at the prompt and the reference file as well.
[00:25:30]
So over here, you can see that I’ve, uh, clicked on Upload Reference File, which was an option that I had on the right-hand side, and this is basically the uploaded reference file. So, uh, again, the text extractor works on the reference files to create it in a format with the layout intact and just the text.
So this is the context on which the chosen LLM over here will be working on and, uh, using for the data enrichment. So over here in this prompt, you can see that, uh, we are accessing this particular variable, which is the educational details that have,
[00:26:00]
that have been ex-extracted, and we’re looking at the degree or qualification.
So whatever format it comes in, convert it to the format given in this particular reference file. So this is how you refer to the files that you upload, and you can see we’ve uploaded the file over here as a CSV. You can also upload it as a PDF or any other file format that Unstructured natively supports.
And you basically have to take the value under the full form column and return the final JSON alone. So this is the simple operation that we’re doing with the reference files that [00:26:30]
are uploaded. And again, this also, uh, supports versioning. We have multiple versions that have been deployed over here. So that is basically the value you’d see under the enriched output.
So over here you can see that there is Bachelor of Fine Arts, and it has been expanded into the full form. So this is another use case of lookups, and, uh, so far we’ve just been dealing with one variable. Uh, we’ll also take a look at a slightly more complex, uh, use case with the invoice and, um, with another invoice.
So, uh, this is
[00:27:00]
basically where I get the invoice, and I take the individual line items from the invoice, and I route it to different account ledgers depending on the kind of expense and the kind of vendor I get that particular invoice from. So let me, um, take you through that
So I have the invoice and I have a bunch of line items over here. You can see we again have a few prompts,
[00:27:30]
and this, uh, lookup over here is actually implemented in the third prompt where we’re getting the description of the invoice and the vendor name, which is already extracted in the, uh, first prompt.
And what we are going to do is basically enable the lookup To take a look at both these values. So we are looking at both the, uh, vendor name as well as the line items. And depending on these values, I have a chart of accounts over here, which basically, uh, portrays
[00:28:00]
what, uh, expense should go into what ledger.
So it could be depending on the vendor. So we have vendor-specific coding rules, and we also have general account ledgers. So depending on the kind of expense you have or what it is used for, you can route it to different ledgers, and we have the code for the account ledgers as well. So that is the instruction that I’ve given over here.
So we are saying first check the vendor-specific coding rules, and then we are going for the general ledger accounts. And if no match is found, it would give this as any vendor. So this will
[00:28:30]
return a JSON object where we have the account, the general ledger account code that is given, and if there is no code present, then we get the result as uncoded.
And we’re also extracting the cost center and the rationale. So one… This, this, uh, output over here gives you one short sentence explaining why this account was chosen and why it could, uh- It could be confidently coded. So it also gives you a certain level of, um, accuracy where… I mean, you get an explanation, so you have more, um, trust in the output that you
[00:29:00]
get.
So now that we’ve taken a look at this particular, um, setup, let’s take a look at the raw view. So in the raw output over here, I, I am extracting the vendor name, the description, and the quantity, the HSN code, and the amount. Now, if I click on the enriched value, you can see that we also have the general ledger account code, the cost center, and the reasoning as to why this particular, uh, expense was routed to this particular account.
So this has been given for all the line items that you have over here. And this… With this,
[00:29:30]
I’d like to wrap up the demo segment of this webinar. And, uh, you can explore this on your own terms. We have an extensive documentation on lookups, how to set it up, and we have various other use cases that we’ve explored in the documentation.
So, uh, my team would have dropped the link in chat for you to take a look at. Now, let me jump back into the, uh, platform. But before that, so, uh, I was talking to you about how you can upload documents into the platform. We take you through the text extraction phase, and then, uh, we perform the data extraction.
In this webinar, we focus
[00:30:00]
specifically on lookups, but you get a general idea of how the text, uh, data is extracted. And you, again, have multiple features under the prompt studio settings. So you have certain accuracy-enabling capabilities. For instance, the LLM challenge over here that you see is basically, uh, where you can set up another LLM model to run parallelly on your ex…
uh, you know, against your extractor LLM on your prompts, and these two models would communicate with one another, and only if their extracted output matches one another is it going to be given to the user. Otherwise, you would get a null result. So this
[00:30:30]
is one of the ways in which you can, um, prevent any LLM hallucinations or incorrect outputs from, um, getting and, you know, passing it down to your downstream operations.
And again, we have, uh, various other capabilities, like summarized extraction, which is a cost-saving feature. You can, uh, set up custom values and perform some dynamic extraction as well. And, uh, we also have highlighting. So what happens over here is if I enable highlighting and, um, I click on any of the extracted outputs, it would automatically highlight where that particular output
[00:31:00]
was fetched from from the original document.
So these are certain other settings that you can explore. And, uh, for the want of time, I’m not going to be going into too much depth. And another, uh, prompt engineering capability that we have is the agentic prompt studio. So this is basically where you can actually automate your, uh, extraction end-to-end.
So when I create prompts using the agentic prompt studio, I do not have to manually specify the prompts at all. The system itself takes care of it and generates a prompt depending on the kind of documents that I’ve uploaded. So we have extensive webinars on
[00:31:30]
this, and documentation and, uh, blogs as well that you can take a look at.
So once… What is the final step? So once I create a project and it’s running well, I would a- have to export this project as a tool and, uh, you have the… Let me just open up the project again so you get to see where this is
All right, let me just open up a random project. Over here we have a restaurants invoice So once I export this particular project as a tool, I would have to, uh… I, I can
[00:32:00]
deploy this tool in my workflows and create– deploy it in multiple, uh, formats. So we could have API deployments. The platform natively supports API deployments, ETL pipelines, especially when you need to get the document from a file system, process it and route it to a destination database or a data warehouse, that’s when you go for ETL pipelines.
And task pipelines, as you can see under, uh, the Manage panel over here, the task pipeline is basically for you to, uh, get the input document from a file system, perform the extraction using a tool, and route it
[00:32:30]
to an, uh, destination file system. So there are multiple ways in which you can deploy the project, and for certain advanced use cases, we also support n8n and MCP servers where you can use both the platforms, uh, LLMWhisperer as well as Unstract for your, uh, workflows.
So that said, we also have a human-in-the-loop, uh, feature that we support, which, uh, which is basically a stage that you have right before you send it to the destination DB. So you can route this, uh, route the extracted outputs for a human review wherever needed and,
[00:33:00]
um, that is also another capability innately supported in the platform.
So now that you have a picture of how Unstract works end-to-end, so you get the document, you do text extraction, then you perform the data extraction and then if needed, you have a human layer for review, and finally you send it to the destination DB. So, uh, this is basically how the entire workflow or pipeline would ideally look.
And that said, let me go back to the presentation. And I’ll be concluding this webinar with a bunch of best practices for,
[00:33:30]
uh, especially for data enrichment. So firstly, always include a fallback rule in your enrichment prompt. Tell the LLM exactly what to return when no confident match exists. And also be explicit about the output shape, because vague instructions usually, uh, lead to verbose responses, and downstream systems can often struggle with them.
Thirdly, quote the variable values in the template. So this is another important, uh, aspect to look at, because if you get the variable, uh, the syntax of the variable wrong, then
[00:34:00]
your prompt is not going to work. And fourthly, scope reference files tightly. So what we mean by this is that when we are uploading reference files, it’s important that you upload just the relevant data that you need for that particular enrichment.
Because, uh, once you’re… if you upload a long file with various other details, then it’s going to take you that much longer for you to get the extraction or enriched output Fifthly, reuse lookups across projects. So we saw how we had a central repository of lookup. So it’s, it’s, um, suggested that you go for
[00:34:30]
this, uh, lookup, uh, every- wherever ne- wherever you can, because this gives you a jumpstart in setting up a lookup or, uh, in your data enrichment process, and you’re not…
you do not have to go through this manually over and over again. And finally, test the lookup before you go into practice or implement it. So these are the various, uh, best practices that I wanted to, uh, you know, quickly cover. And, uh, before we move into the Q&A, here are some of the, um, feedback that we’ve gotten from our users.
So, uh,
[00:35:00]
we’ve been reported with a 99% extraction accuracy, a 90% straight-through processing rate, 20X improvement for users in operational efficiency, and also 80% fewer human touch points with Unstruck Now again, uh, we also… In this webinar, I’ve tried my best to, um, cover as much as I can, even though it was a, a very focused webinar on data enrichment and lookups.
However, if you actually want to explore this in more detail, what most of our users do is sign up for a free
[00:35:30]
personalized demo where we sit with you one-on-one, understand your business needs, and we can see how to customize the platform better for you. So we have the link given in the, uh, chat that you can, uh, book in case you are, uh, interested in this.
And that brings me to the Q&A. So let’s take a look at any questions that we have before we close this session
[00:36:00]
Okay, we have one question over here
Okay, uh, how does lookups affect our costs? Is it a separate charge on top of extraction, and can
[00:36:30]
we track it? So this is usually, um… I mean, it… You have a separate dashboard on, you know, how you, uh, use the lookup, but it’s basically the same cost that your LLM provider, uh, you know, uh, specifies or the text extractor specifies.
So nothing different over there. We just… But we do have a separate log for you to access how lookups alone are accessing, uh, the LLM and the text extractor
So I think that has been answered
[00:37:00]
All right, folks. So I think, uh, that’s about it. Thank you so much for joining, and I really look forward to seeing you in our upcoming webinars. Um, have a great day. Bye-bye
See Unstract in action with walkthroughs of core features and real extraction workflows.
Managed cloud, on-premise, or open-source. Unstract adapts to your infrastructure needs, so choose what works best for you.

Prompt engineering Interface for Document Extraction

Prompt engineering Interface for Document Extraction

Make LLM-extracted data accurate and reliable

Use MCP to integrate Unstract with your existing stack

Control and trust, backed by human verification

Make LLM-extracted data accurate and reliable




Spreadsheet data extraction: Handling multi-tab, multi-format files & more