[00:00:00]
Hey, everybody. Thank you so much for joining and, uh, welcome to the session. I’m Mahashree, product marketing specialist at Unstract, and I’ll be here to take you over the session. So it’s great to have you all join us today for this webinar on contract data extraction. Many of you might be from insurance, legal services, banking, real estate, or really any industry because we run into contracts almost
[00:00:30]
everywhere.
So as the title indicates in this session, we’ll cover a comprehensive guide to contract extraction that will take you from buried clauses to usable data. In addition to that, we’ll also uncover some hidden extraction challenges that teams continue to face even in this age of AI. Our focus today is primarily on contracts, but where we’ll be digging in, um, that is where we’ll be digging in with real examples, but many of these challenges show up in other document workflows as well, whether that is
[00:01:00]
invoices, forms, or something else entirely.
And that’s what makes this webinar useful even if you are not dealing with contracts primarily because the same solutions we’ll show you today on Unstract can be applied on other documents to solve those, uh, to solve similar challenges as well. So that said, here is the agenda for today. So it’s a pretty straightforward, uh, list of items that we’ll be covering.
So we’ll begin by covering challenges in contract extraction. So this could
[00:01:30]
be pertaining to the documents themselves or the workflow setups. And then we move on to covering the solutions on Unstract to overcome these challenges. So this is the meaty section of the webinar where we’ll go into an in-depth demo on the platform.
And finally, after the session recap and final note, we’ll head into the Q&A where an Unstract expert will be on air to take your questions live Now, before I get started, here are a few ground rules or ses- uh, session
[00:02:00]
essentials that I’d like to quickly go over. We’ve also dropped them, uh, in the chat for you to take a look at at any time.
So firstly, all attendees will automatically be on mute. This is a listen only webinar. You can post any of your questions in the Q&A tab during the session at any time. Our team is working in the back end and we’ll be able to get back to you, uh, with the answers via text. And in case your question is not taken up, not to worry, we’ll take it up towards the end of our session in our interactive Q&A.
You can also use the chat tab to introduce yourselves, interact with fellow
[00:02:30]
attendees, and this is also where you let us know in case you run into any technical glitches during this webinar. And as a final point, when you exit the session, you’ll be redirected to a feedback form, and I request you to leave a review on there so that we can improve our sessions going forward.
So that said, before we dive into the challenges, I wanted to take a step back for a minute or two and talk about contracts themselves, why they matter, and why extracting data from them is such a big deal.
[00:03:00]
Contracts are really the backbone of every business relationship. So if you take a look at a vendor deal, a customer agreement, lease, or even employment relationship, it all runs on contracts.
And it’s easy to underestimate just how many of these are floating around at any given point in time in a business because even a midsize company can have thousands of active contracts spread across multiple departments all at once. And they also contain some of the most critical information on the businesses terms and conditions and its relationships with third
[00:03:30]
parties.
It could be pricing, deadlines, deliverables, renewal, and a lot more. And ultimately, getting this data wrong can severely impact your business down the line. So while this establishes the why, why contract data matters to a business, what is exactly coming in the way? And that brings us to the challenges faced by businesses when it comes to contract extraction Now, to understand these challenges better, uh, we’ve put them under two different buckets.
That is the document challenges and workflow
[00:04:00]
challenges. Now, document challenges are about the structure and the format of the documen- uh, of the contracts themselves. Workflow challenges, on the other hand, are actually about running the extraction end-to-end, the process and everything that has to work around it for it to happen.
So we’ll be taking a look at what comes in the way, uh, for run… you know, in between running these processes. So now coming to the document challenges first, one common attribute of a contract that makes it difficult to work with is that it often comes with dense
[00:04:30]
prose. Now, dense prose makes it difficult for any extraction system to retrieve data from as it is closely…
It has closely packed text in it. And I’m not just talking about traditional OCR. We’ve seen this even with LLMs that they can sometimes struggle when, uh, text is closely packed against one another. The key to solving this problem is to first pre-process your original contract so that you create a context that is LLM ready, and we’ll see how to do this in our demo segment using a
[00:05:00]
preprocessor tool Another important challenge is cross-referencing.
So in contracts especially, to completely understand a clause on a particular page, many times you’ll need to get the context from another clause from another page, and that means that you’ll have to cross-reference that clause that is present on another page. So this also means that you cannot process your pages in isolation, and you need an extraction system that not only extracts the document data, but also
[00:05:30]
understands it, and that’s exactly what LLMs are here to do.
Moving on, the third challenge that we have is inconsistent formats. No two contracts look alike, and there is no industry grade format to go about this. So this is going to be a nightmare if you’re especially relying on rule-based templates because they are… There are more rules to contracts. LLMs don’t rely on rules, so this problem has been solved to a large extent already.
But challenges that still pers-, uh, persist in inconsistent formats is that the format
[00:06:00]
itself could be difficult to read. For instance, you could have scanned contracts or contracts with handwritten text. So while da- uh, dealing especially with dated contracts, you could be having a lot of scans. So you might have an old contract that has been scanned and now uploaded into the system.
And the, uh, n- uh, not always are you going to be dealing with a perfect scan. You could have low quality mobile photos or, uh, you could have scans with bad lighting, skewed scans and, uh, you know, documents with a lot of noise and grains. So when this
[00:06:30]
happens, even the best of elements can struggle. And the answer again to this is document pre-processing.
So we’ll again take a look at how this works when we go into the demo segment. And another, uh, format that I spoke about is having handwritten text in your document. So many old contracts can themselves be fully handwritten, or you might be having some text or amendments inserted here and there in an otherwise digital contract.
So this, uh, and, and again, another classic component of, uh, contracts is the signature which is mostly
[00:07:00]
handwritten text. So you’ll have to be dealing with all of this when it comes to, uh, the contract formats and the different elements that a contract has As a fourth point, we have complex tables. A lot of important data in a document might be packed in tables with complex structure.
So you could have missing rows and columns, merged headers or nested tables. With Unstract, you can actually deploy specialized tools just for table processing so, so that this, uh, doesn’t become, uh, very
[00:07:30]
difficult. Because with normal tools, with, uh, you know, these nested structures or merged cells, this can be quite difficult, and we’ll take a look at this as well in the demo.
And finally, contracts can get long, especially when we are looking at some legal or financial agreements, and sometimes they might not fit into the elements context limit. What we mean by this is that if you are using elements to process contracts, there is a limit to how many tokens or number of pages that it can process at any given point in time.
So when your
[00:08:00]
contract exceeds this limit, you will have to break it down into separate segments and process it individually. So this is called chunking, and we’ll, uh, cover this as well. So these are all the challenges that we see when it comes to the documents alone. And, uh, now let me move on into the workflow challenges one by one.
So firstly, the need for human oversight. Now, high-stakes fields in contracts like the li- liability or termination rights carry real financial and legal consequences if
[00:08:30]
extracted incorrectly. So while it’s important to automate processes to save time, it is equally important that teams route the right contracts or fields to a human for review.
So how do you identify this data that needs a human review? You could do it based on the extraction, uh, confidence score or on various other conditions. So in the demo segment, you will see how you can set up complex review conditions and seamlessly facilitate human review workflows Secondly, there is compliance.
So contracts
[00:09:00]
often contain confidential commercial terms, PII or regulated data, which limits where and how they can be processed. Some industries like finance, healthcare, or the government require data to stay within specific infrastructure or jurisdictions. So auditing requirements means you’ll need a record of what was extracted, how and why, and not just the final output.
So this brings together a lot of points for consideration that you should take into account on how your document extraction system handles
[00:09:30]
data. Does it support logs? Is it compliant with major regulations for handling data? Do you have the liberty to deploy extraction within sovereign frameworks?
These are all the things that you can ask. Up next, there is the challenge of ensuring accuracy, uh, or the accuracy of the extraction. So even though LLMs help overcome a lot of traditional document extraction challenges, they can at times confidently generate output that is actually incorrect. So this is sometimes due to
[00:10:00]
LLM hallucination or other reasons like not having enough context to get started with.
But this is definitely important to cover because systems, uh, that you use for document extraction need to be equipped with tools to catch these, uh, incorrect outputs and also ensure better accuracy
Moving on, moving on. Another workflow challenge that we have is data enrichment. So even if you accurately extract the data from your document, you need to enrich it into a format that suits your
[00:10:30]
business needs. Now, even let’s say you take the example of contracts for, uh, the same field, let’s take the date.
You would have the dates spread across different contracts, and you might have the date given in different formats. So while in one contract you could have the date given in an alphanumeric format, in another one you could have it completely in numbers, whereas in your business systems you would want to store it in a specific format.
This means that when you extract the data and before you store it into your business system, there comes an in-between stage
[00:11:00]
of data enrichment where you’ll have to enrich it in whichever format that you need. So this is another important step and, uh, is also a workflow challenge that we see. Now, I’ve taken a very simple example of the date, but this can get a lot more complicated than that.
And finally, there is business connectivity. So ultimately your document workflow is a portion of a larger business process that is already in motion, so it needs to natively integrate with the apps, the databases or the file systems that your
[00:11:30]
business might be using. And with that, we’ve gone over both the document as well as the workflow challenges in contract processing.
And while these challenges are definitely true for contact– contracts, they are not only seen in contracts. In fact, we see many of them spread across other documents as well. Now, Unstract is a document agnostic platform, so while we take the example of the contract in this webinar, even if your primary focus is not contracts, do stick around because this demo will
[00:12:00]
still be relevant.
And with that, let me introduce Unstract to you, especially for those of you that are completely new and joining us today in this webinar So Unstract is an agentic AI document processing and extraction platform. If I had to briefly put the capabilities of the platform to you, I could segregate it into three buckets.
That is the extraction phase, development phase, and finally the deployment phase. So once you upload your document or contract into the platform, the first stage that I, uh… that it goes through is
[00:12:30]
text extraction. This is also the pre-processing stage that we were talking about earlier. So as I mentioned, documents come in various formats.
It could be scanned, it’ll have various document challenges. So instead of the LLM actually dealing with all the noise that is there in the original document, what this stage does is it pre-processes, uh, the document. It extracts the raw text while preserving the layout of the original document. This is because LLMs understand context very much like humans do, so the best way in which you can
[00:13:00]
feed in the complete context of your documents to the models is to preserve the original layout of the document, and that’s exactly what the text extraction phase does.
So we’ll take a look at this, and once this LLM ready context is ready, you can then define prompts on this context, which will define what data to extract and also the schema for extraction. So this is usually the heavy lifting phase of document extraction when you deploy elements to extract your data, because this is where you require a human to come into the
[00:13:30]
picture and write the prompts and actually test how it is working on your documents.
Now, the update with Unstract is that even this entire process of prompt engineering can be automated today using the Agentic Prompt Studio. We’ll take a look at that as well, and this comes equipped with a bunch of accuracy enabling capabilities too. So once you write your proms, you test it on your documents, you ensure that accuracy is being maintained, then you can…
Once you’re happy with the way the extraction is being done, you can now
[00:14:00]
export this project, and you can deploy it in multiple ways depending on your business needs. So natively at Unstract, we support API deployments, ETL pipelines, task pipelines, and also human reviews. And for advanced use cases, you can go for MCP servers or N8N workflows as well.
So that said, I’ve, like, tried to sum up the complete workflow on Unstract over here for you, and, uh, we’ll take a look at this. You’ll understand this better once we move into the demo. If I had to throw some numbers out there, uh, you know, on where
[00:14:30]
the platform stands today, we have over six point six k plus stars on GitHub, a one thousand plus member Slack community, and we’re currently processing ten million pa– uh, pages per month by paid users alone.
And apart from this, the platform is also compliant with major regulations like HIPAA, GDPR, SOC 2, and ISO. And I thought I’d bring that to your attention as well, because compliance was another challenge that we looked at earlier So that said, before I jump into the demo, we are going to be covering a range of capabilities today.
So I
[00:15:00]
thought I would just summarize the key capabilities that you can look out for before I actually go into the demo. So firstly, we spoke about document pre-processing. So we’ll take a look at how you can deploy a, a text extractor. Primarily in this demo, we’ll be looking at LLMWhisperer, which is Unstract’s very own in-house text extraction tool, and you’ll see how it can actually extract the raw text from your document and create an LLM-ready format and how it overcomes various, uh, challenges that you might face on your original document.
[00:15:30]
Secondly, human in the loop. So we’ll be looking at this capability. So we’ll see where you can clearly define roles, enable smart routing. So smart… By smart routing, we’re talking about the conditions that you set for human in the loop. And, uh, and finally, we’ll see how you can facilitate the complete review process in one place.
So we’ll take an interfa– uh, we’ll take a look at the interface that facilitates this as well. Thirdly, chunking. So we spoke about lengthy documents earlier when we were covering the challenges. So, um, Unstructured also supports smart chunking and advanced retrieval strategies for
[00:16:00]
extracting your data.
We’ll take a look at these. And finally, ensuring extraction accuracy. So from LLM challenge to confidence scoring to the mismatch matrix, these are all different tools that the platform supports you with to help you extract data with greater accuracy, and we’ll be covering them as well. So I thought I’ll, uh, put this out there so you are, you know, you, you know what to expect as well once we move into the demo
So that said, uh, let me open up the platform, and I hope you can see my screen.
[00:16:30]
So what I have over here is the Unstract interface, and, uh, this is basically the dashboard that, uh, you know, first opens up once I log in. So you have various key metrics from the page… number of pages processed, the documents processed, the number of failed pages, and, uh, API requests.
So we have a bunch of key, uh, metrics that you have over here. And following that, we have a few trends as well, so the number of pages processed in the last thirty days, the HITL reviews and completions, and the trend analysis is given over here.
[00:17:00]
And the first step you would have to do once you log into your platform, and if you are a new user, is to actually set up certain prerequisite connectors that are required for you to get started with document extraction on Unstructured.
So they are, uh, your LLMs, vector DBs, embedding models, and text extractors. So you can see them over here under Settings. Now, of course, the platform is LLM-driven, so we have a bunch of elements that you can, you know, integrate with. So you just have to click on the model, enter the, uh, uh, credentials and whatever
[00:17:30]
requirements are out here, and then you can get started and set up your integration.
And we spoke about sovereign AI frameworks as well. So Unstract also helps you integrate with NVIDIA, uh, models so you can, uh, you know, host the model in your own infrastructure, so none of your data actually leaves your, uh, um, infrastructure, and you don’t have to risk sensitive information. So we have a complete webinar, in fact, on how to implement sovereign AI frameworks.
And I’ve, um… I mean, my team would have dropped the link in chat for you to check it out,
[00:18:00]
and you can take a look at that as well. So these are the other models that we integrate with. And similarly, we have vectorDBs
Embedding models, and finally the text extractor. So the text extractors again where you’ll find LLMWhisperer. So, uh, we also have other text extractors that you can integrate with, and we’ll be taking a look at LLMWhisperer in a little while. And apart from that, you have various connectors over here.
So these connectors are nothing but
[00:18:30]
the various… Um, we spoke about business connectivity and how it is important, so your system, uh, should be able to integrate with various file systems and databases, and you have the various native options that Unstract, uh, you know, integrates with right here. Now let me actually explore LLMWhisperer because the first stage, as I mentioned once you, um, upload your document, is to extract the raw text and pre-process it into an LLM, LLM-ready format.
So that is done using LLMWhisperer, and while
[00:19:00]
you can use this, um, tool as part of Unstract, since some users have their requirement very specific to just text extraction, we also offer it as a standalone solution. So by clicking on the dropdown on the top left-hand side, I’m gonna click on LLMWhisperer, and this opens up to the LLMWhisperer, uh, standalone tool.
So over here you can upload any document of your choice, and over here let me just upload a s- a sample NDA that I have
[00:19:30]
So you can see this non-disclosure agreement. This is the original, uh, document that I’ve uploaded. We also have a checkbox over here, and this is otherwise a pretty, um, you know, digitally native document, and we just have some handwritten text over here at the bottom. So you can see how, uh, LLMWhisperer has been able to work on this particular contract.
You have the, uh, check box ex-extracted
over here with the value checked that is represented with an X. And you can see how the layout has been preserved. So this is basically the
[00:20:00]
context that will be sent to the LLM for data extraction. So you have the signature extracted over here as well. This is another important capability that you’ll need to be looking out for since…
especially when you’re dealing with contracts, you might sometimes want to ensure that all the signatures are present in the document before proceeding, uh, with downstream operations. So one important thing with LLMWhisperer is that you can upload any document of your own, and you have a hundred pages that you can upload for free on a
[00:20:30]
daily basis and access the end-to-end capabilities of the platform.
So this is to give you enough time for you to evaluate the platform and see how it is working on your particular documents or you also have a range of sample documents that you can check out over here. For instance, I have a handwritten form right here. So this is a loan application, and you can see that I have radio buttons, I mean, I have checkboxes, I have text fields, I’ve also entered the date.
So a bunch of things are present over here, and it’s a mix of, um, text that is, uh, you know,
[00:21:00]
digital as well as handwritten text. Let’s just give the platform some time. And you have the extraction right here. So you can see that, um, the personal information, for instance, the name is given, um, with, you know, handwritten text, and you have the exact text that is extracted over here.
Similarly, we saw how, uh, LLMWhisperer was, uh, extracting the, um, checkboxes as well, and you can see that the, uh, checkbox that has been checked has been extracted. We have the date that is extracted over here. So similarly, you can go through
[00:21:30]
this context, um, and explore any of the other pre-uploaded documents that we have.
So we have some tables, some complex tables that are, you know, tightly packed. We also have an off-oriented scan over here. This is a pretty difficult scan to decipher. So it is not even oriented correctly, and you can see that the text is pretty blurry. It’s not very clean. And, uh, let’s just wait a couple of seconds for, uh, the result, and we have it right here.
So you can see how, um, the tool has been able to actually
[00:22:00]
fix the orientation of this ID card, and you have the text given, uh, pretty cleanly over here. This– so this is the context that the LLM will be working on and not this original document that you have here. So this will be difficult since the text and the noise in this document is pretty high, but with this context, you’re almost, you know, guaranteed better accuracy Similarly, we also have a scanned receipt over here with bad lighting.
So you can go through this on your own. I just wanted to take you through how LLMWhisperer
[00:22:30]
looks. Now let me go back to Unstract. So that is the first stage of, um, document extraction, is that, uh, that is, you know, driven by elements which is first to pre-process your documents. And secondly, now we can move into the, uh, development stage where we do the actual prompt engineering to extract the data from the contract.
And in Unstract, as I mentioned, we have two different options. So you can either do the prompt engineering manually using the traditional Prompt Studio, or we’ve also released the Agentic
[00:23:00]
Prompt Studio lately, where you can, um, completely automate the entire process. So in certain use cases, you might go for different prompt studios.
For instance, if you already have a set of prompts that are ready, then you might as well go for the Prompt Studio, um, the traditional Prompt Studio, since you might want to upload these prompts manually. Or if you just have the documents and you’re not very keen on what data to extract, but you just want to automatically generate a prompt that extracts all the key data fields from that document, then you can go for the Agentic
[00:23:30]
Prompt Studio, and you can also edit the prompt further in case you want to tune it.
So we’ll be exploring both these, uh, tools today. Firstly, I’ll go into the Prompt Studio So in this, um, demo, uh, I’ll be exploring the commercial lease extraction over here. So the first step, once I, uh, enter the prompt studio for a new document, I’ll have to click on Create New Project, and, uh, I’ll enter the details over here.
But to save time in this webinar, I am going to be going into an existing project that I have where I
[00:24:00]
have extracted some data on a commercial lease. So we have the lease over here, and we have a bunch of prompts on the left-hand side. So you can see that this is a pretty lengthy document. It’s, it has sixty six long pages.
So this is, you know, uh, one of those documents where you might actually require chunking to break this document down and, um, you know, extract the text accordingly since it might exceed the LLM’s context limit. So this is the original document that I’ve uploaded, and when I click on Raw View, you
[00:24:30]
have the extracted, um, uh, context over here.
So LLMWhisperer has been deployed on this particular project, where you can see that is under the Prompt Studio settings. And over here you have the LLM profile. So there is a default profile that the model itself, uh, that the, uh, system itself chooses for you. Otherwise, you can edit this profile, change the name, and you saw how I was able to set up connectors with multiple elements, with multiple vector DBs.
So I basically have all the options available over here
[00:25:00]
that I can just, you know, click and choose from, and I can set up the, uh, connector and get, uh, get started. So similarly, it’s available for VectorDB and Embedding Model and Text Extractor as well. And under Advanced Settings, you have the option of setting your chunking and retrieval strategies.
So you can see that over here I have actually set up the chunk size and the overlap value So what I mean by this is when I break down the document into smaller chunks and when I want to enable
[00:25:30]
chunking, I’ll have to specify what is the size of a particular chunk. So over here, I’ve said that one chunk has four thousand ninety-six tokens in it, and the system will accordingly break down the document into different chunks, uh, with each chunk in this size.
And what is the overlap value? So when you break down a document into different chunks, at the point where it actually breaks, you might end up losing context over there, where it might not go b– you know, uh, it might not belong to the first chunk or the second while you’re
[00:26:00]
working with this in practice.
So with the overlap value, what we are doing is we preserve a certain set of characters from the subsequent chunk in the first chunk, and then we have a few characters from the end of the first chunk in the second chunk. So this is basically where you have an overlap of context, and this preserves continuity.
So that is what we are defining over here, the number of tokens that need to, you know, actually overlap between the breakage of two different chunks. And once you define the size of your chunk, then
[00:26:30]
you’ll have to… You also have the option of choosing from different retrieval strategies in Unstract. So what we mean by retrieval strategies is there are different ways in which you can actually retrieve data from your, um, uh, different chunks once you split it up.
So we have the different options over here. We have a pretty extensive set of options, and you have the description for each of these, um, uh, retrieval strategies. So you have the simple vector retrieval, where you basically just go through the semantic similarity. You go through all the chunks, and you
[00:27:00]
see which one semantically matches for your particular prompt, and then you choose the top few chunks by defining the top K value that, that you have over here.
So in this case, I’ve chosen three, which means it’ll, uh, choose the top three chunks from the document and extract the data or the context for the output from that. And, uh, we have the fusion retrieval model. So this is for slightly more complex queries where you, um, merge multiple -chunks together and you retrieve the data from that.
So this can be
[00:27:30]
useful for handling ambiguous or multifaceted questions, and improving recall when simple retrieval misses context. Similarly, there is subquestion retrieval. So this is basically when you have a pretty long prompt, and you might have multiple questions in a single prompt. So what this, uh, retrieval strategy does is it breaks the prompt into subquestions, and for each question the retrieval is done separately, and then the output is merged and given to you.
So similarly, we have various other models like recursive retrieval, router based retrieval, keyword
[00:28:00]
table retrieval. So this is where you, uh, it–the model picks up on the keywords that you’ve given in your prompt. So especially if you are, let’s say, dealing with tables, the tables are bound to have specific keywords, and if you’re looking to extract data from a particular table, then you might want to go for the keyword re-, uh, table retrieval, where, um, you basically specify the k-uh, keyword and the system will be able to, um, search for that particular, uh, keyword in the table and retrieve that value accordingly.
And finally, we also have auto merging retrieval. So in
[00:28:30]
this, uh, webinar I’m not going to go through all of these strategies one by one, but we do have another webinar that covers this in detail with a demo of its own. So you can take a look at that. Again, the links are, uh, given in chat. And, uh, so as… I mean, for this particular project, I’m going to be going with the fusion retrieval And that basically sums up the LLM profile that I have over here.
You can see, I have various other capabilities in the, uh, prompt studio settings. So summarized
[00:29:00]
extraction is for me to save up on costs. So what happens is this particular feature basically takes, uh… The document creates a summarized context of the document, and your data extraction will be done on this particular context.
So, uh, that is one capability. We also have single cost, uh, I mean, um, we also have s-single pass extraction where you basically, uh, combine the various prompts and run it just once against the context of your document so that you don’t end up running each, uh, prompt
[00:29:30]
individually on the entire document. So this saves up on a lot of tokens.
And again, we have LLMChallenge. So we spoke about this. This is basically, um, an accuracy enabling capability. We had covered this earlier. So what happens is you have an extraction LLM running on your project, uh, which is basically used to deploy your prompts and extract the output. And when, when you are wary of LLM hallucination or you wanna catch these incorrect outputs, what you can do is define another flagship model
[00:30:00]
which works, uh, on the same prompts, and only if the output between these two models is in consensus, is it given to the user?
So even if one model does not agree with the output of the other model, y-you’re given a null answer since a null value is still a better value to deal with than an incorrect output that will go straight into your downstream operations. So similarly, you have various other settings over here and, uh, I’m not going to be going into too much detail, uh, in this webinar on these settings since, uh, you know, it might
[00:30:30]
take time.
So you can, you know, check out the documentation for that. You’ve seen that, you know, we’ve enabled LLMChallenge over here. So let’s see how it’s actually deployed in practice So we have the various prompts. So each prompt has certain, um, um, structures and elements. So we have the title given, the description, we have an output data type for each prompt.
So this you, you can choose from text, number, email, date, Boolean, JSON, which is another common output data type that we see people go for. And again, as I mentioned, for
[00:31:00]
tables especially, when you are dealing with complex tables with nested structures and a lot of merged cells, you might want to go for the agent table output data type.
So what happens is, this Agentic Table, uh, Output, once you enable this, you have a bunch of models running in the background that ensure that your table data from even complex tables is extracted accurately. So each model takes care of a specific function, and we’ve, uh, you know, dived into this pretty deeply in previous webinars and, uh, documentation as well.
[00:31:30]
So you have the first prompt over here that is basically extracting the overall context of the document, this particular contract, and it’s asking me to give a brief of its contents, and you have the output given over here. And similarly, the second prompt that I have is, uh, capturing the glossary and terms and definitions of, uh, you know, uh, this particular contract.
So we are extracting the term, the definition, the section reference, as well as other terms that are given, and you have the detailed output given over here. And
[00:32:00]
since I have enabled highlighting, what I can do is I can click on each of these, um, extracted output, and the system automatically highlights the exact portion of the document from which this particular output was fetched.
So this is another, um, uh, capability that you have with the Prompt Studio. Moving on, we have another prompt that is extracting payment obligation and, uh, you have the output over here. So we are extracting the amount, the due date, the payer, the payee, and
[00:32:30]
all those details. And finally, we’re also extracting the termination rights extraction.
So as you can see, each of these prompts have defined two key details. That is what data are you going to extract? What are the instructions for this particular extraction? What you should be looking out for? So all of this is included in the prompt, and it is also given a very clear schema for extraction, which is followed once, uh, you know, you have the output over here.
So this is basically how the, uh, prompts are run. So once you define your prompt,
[00:33:00]
you can either run all prompts together over here on top, or you have the option of running individual prompts. And, um, you can also upload multiple documents. For instance, over here I’ve just uploaded that one, uh, sample contract, but you have various…
Uh, I mean, you can upload multiple options by clicking– uh, multiple documents by clicking on the Upload, uh, option over here So that basically, folks, sums up, uh, what Prompt Studio can do. We looked at how, you know, the prompts are uploaded, how the data is extracted, how you can
[00:33:30]
define the output data type and the various settings that you have in Prompt Studio as well to ensure accuracy and save costs.
So once I’m happy with this project, what I can do is export this as a tool, and I just have to click on Export, and I can export it as a tool. And now I can deploy this project natively as an API deployment, ETL pipeline, task pipeline or human-in-the-loop deployment. Now, I have deployed this project as an ETL pipeline, and we’ll see how you…
You know, how to set up, set up that workflow in some time and,
[00:34:00]
um, you know, how to also get the human review included in that workflow. But before I get there, since we are already in the development stage of the entire, uh… If you remember, we went through the extraction phase and then the development phase and finally the deployment phase.
So another, uh, key feature that I wanted to cover is the agentic prompt studio. So this is the traditional prompt studio where you have to manually define your prompts. In the agentic prompt studio, you will see now how you can actually, um, upload your documents, and the system takes care of the
[00:34:30]
prompt engineering on its own.
So I’ll be creating a sample project over here for this. I’ll be extracting, uh, details from a non-disclosure agreement So I’m gonna give this a name and also a description So once I do this, this opens up to the Agentic Prompt Studio interface. And the first step I’ll have to do here is go into settings and set up the various models that will be working on this project.
So with the Agentic Prompt Studio, you have the flexibility of
[00:35:00]
choosing between multiple models to work on specific tasks. For instance, you have a model that’ll just work on, uh, you know, extracting… I mean, running the extraction prompts on your documents. That is the extractor LLM that I’ve just chosen.
The agent LLM basically is used to generate the prompts and schema. So, um, and you have like, uh, a LLMWhisperer connector for text extraction and preprocessing, and finally a lightweight LLM, which is used for tasks like generating, uh, prompt metadata. So these are fairly simple tasks. So you can
[00:35:30]
see that you have the flexibility of not just choosing one common LLM model, uh, I mean LLM.
You can choose different elements for specific functions depending on your needs. So let me just do that over here.
So once I, uh, choose the models of my choice, I can upload the, uh, contracts that I want. So in this, I’m going to be… In this project, I’m gonna be uploading three NDAs
[00:36:00]
All right So you can see the, um, agreements over here, and I’ll just take you through all three so you have a different one, a different agreement that is given over here. And you finally have… So I just wanted to, you know, quickly take you through, uh, the documents so you know what we are working
[00:36:30]
So as I said, the first step is to extract the raw text. So I can trigger this in the Agentic Prompt Studio by clicking on these three buttons. So depending on how many test documents you’ve uploaded, you’ll have to, you know, enable the raw text for each of these, uh, documents and the system is now extracting the text from the contracts and you can access them over here by clicking on the Raw Text button next to the PDF view.
And you have the layout intact, uh, view that is, uh, you know,
[00:37:00]
given over here. And you can also check out the extraction by clicking on the View button right next to the, uh, uh, you know, each of the documents. So this is where once your raw text is extracted, the next stage in the Agentic Prompt Studio is to create a summary for each of these contracts.
So what we mean by this is that the system goes through each of these contracts individually, and it identifies the key fields from each of these contracts. So now when I’m creating a common project or a common
[00:37:30]
tool to process just non… uh, you know, NDAs alone, I will be dealing with multiple N-NDAs from different sources, and each of them could slightly, you know, also vary with the kind of confidence and fields that they come with.
So when I’m just using one tool to, uh, you know, take care of the extraction of all these different variants and formats, I will have that– I will have to make sure that that tool, uh, understands the different fields that it could actually encounter, so I do not end up missing out on any field that might be there in one contract but not in another.
The tool should
[00:38:00]
be a com… It should comprehensively cover everything, and that is basically what we are trying to achieve over here, uh, with this stage. Uh, with the Summary view, what you can see is that for each of the uploaded test documents, the system basically identifies the key fields: their name, the description, the data type, and example values that it might have, and it basically gives you the structure over here.
And this is done for each of the uploaded sample documents. So this is how you make sure that y-your tool ends up, uh, covering
[00:38:30]
all the fields that it could likely encounter. So once this is done, you’ll have to next create or generate schema. So what the schema basically does is it takes all the summaries, and it puts it together into one unified schema.
And, um Basically, this schema is then going to be used to create your extraction prompt. So this schema basically has all the fields from across all the summaries put together, and this is also where you
[00:39:00]
can normalize values. So we spoke about, you know, how, uh, date- dates for instan– uh, instance could be different in different, uh, contracts.
So over here, the schema also accounts for how to normalize fields into a specific, um, structure, and you can also edit the schema, uh, accordingly. So while this is generating, let me actually, uh, take you through another, um, uh, document… I mean, another project that I have on Agentic Prompt Studio because this might actually take time.
The schema generation, it’s, uh, it’s, it’s
[00:39:30]
still far easier than manual prompt engineering, but it could take a couple of minutes. And just to save time on this webinar, I’ve actually already created this project and I’ve run it end to end, and, um, you will take a look at this over here. So you can see that I’ve basically uploaded the same documents over here.
And I’ve run the entire, um, workflow on the Agentic Prompt Studio. So firstly, we’ve extracted the raw text, the summary has been created, and once I generate the schema, you can view it under the Schema tab.
[00:40:00]
This is basically how the schema looks. This is a unified view of all the summaries. So you can see that similarly you have the data field, uh, I mean, uh, the field that you’re extracting, the data type, the title, the description, and also the example values for each of the fields across all the sample documents.
So this is automatically done and given over here for you, and you can edit it, as I mentioned. And once this is done, you’re going to be creating your prompt using an LLM of your choice, and you have the extraction prompt right here. So you can see that this is a pretty
[00:40:30]
extensive prompt that I have, and, uh, all of this was created in just a few minutes.
So you can see that this prompt has an objective, the output of the contract, uh, instructions for the output, extraction method that is given over here in detail, general interpretation rules, how to interpret, uh, interpret the different terms that is given in the contracts. And, uh, you also have field level guidance for extraction.
For instance, let me just take you through this prompt
[00:41:00]
All right. So you can see that for each of the fields, you have, um, you know, the example values that you might likely encounter and also how to… It’s, uh, it has detailed, um, instructions on how to extract each field. So, um, it states the purpose for this particular field and, uh, how to preserve it, uh, whether to extract it preserving the entire, uh, text or, uh, you know, whether you have to…
What you have to
[00:41:30]
look out for before you extract the value. So all of that is basically given over here, and you also have a sample output structure that is given and, um, you take into account the nested objects and the formats, and this is how detailed it actually is. And this is basically, um, I mean prompt engineering could easily take teams days and days of work because you’ll have to make sure that it is working perfectly well across all your sampled documents.
But over here, you can see how within a matter of few minutes, this has been able to,
[00:42:00]
um, the system has been able to generate a comprehensive prompt that you can then use for data extraction. So, uh, let me just go back to the previous project that we were working on. You can see that the schema has been generated over here.
Now let me go back and what I’ll have to do is generate the prompt. So I’m gonna click on Generate, and while the extraction prompt generates over here, let me just move to the project that I’ve already run So once you create the schema and the extraction prompt, you’ll have to first run
[00:42:30]
the, uh… create the verified dataset.
So that is what we have over here. So what the verified dataset basically is, is that the extraction prompt that is generated over here is run once on each of your documents, each of the uploaded contracts over here, and there is– Uh, the extraction is basically given over here. And what the user will have to do is go through this extraction one by one and manually correct any field that might be incorrect.
So I can just click on edit, for instance, and I can just remove this field.
[00:43:00]
For instance, let’s say this is incorrect extraction. Let me just remove this, and I can click on save. So why are we doing this? This is because this helps you create and maintain a golden standard for data. So, um, I mean, business rules are ever-evolving.
Your requirements from your extraction is going to be ever- revolving. So when this is the case, you might have to change your prompts occasionally. And sometimes when you end up changing your prompt, it might affect certain data, uh, fields that you did not
[00:43:30]
primarily intend to. So just to, you know, keep safe your, uh, standard values or, like, you know, just to make sure that whatever extraction you’re doing is accurate, you constantly compare that subsequent extraction once you change your prompt or once the project evolves with this extraction or verified dataset.
And the system will automatically highlight the mismatches so you know which data field is being affected by the changes in your prompt, and you can edit it and, uh, you know, make sure the accuracy is maintained accordingly. So
[00:44:00]
I spoke about how you can also, you know, the prompts evolve and how you can actually edit your prompts.
So let me just, you know, do that for you over here. I’m just gonna edit this prompt, and I’m going to make a very minute edit. And once I click on save, this lets me save this new version, and I can give it a description that I want as well, which basically highlights what change that I’ve made so I can, you know, add those details over here.
Since I did not make any real change this time, I’m just gonna give this as V2. And once I click on save
[00:44:30]
I’ll have the new version available, and I can also roll back to the older versions by clicking on history. And, uh, Agentic Prompt Studio also lets me compare the two versions. For instance, I have the two versions given over here, and as you can see, the system automatically highlights the portions of the prompts where it differs.
So this is basically how tightly I can control the different versions of the prompts as well. And once I basically have the verified data set available, which is
[00:45:00]
base- uh, you know, the golden standard of data, I am going to click on extraction, and this basically runs, uh, the, um The, like, extraction prompt on all the sample documents.
And you will see that once the run is complete, you will have individual accuracy scores for each of the sample contracts. So what this accuracy score is basically, is basically how well, uh, the extraction run matches with the verified dataset. So I can click on any of these accuracy scores,
[00:45:30]
and I can view this in different formats.
And you can see that the system automatically again highlights the exact mismatches between the verified data set and the extraction output. So you can see that this is literally the change that I just made, and I have both the, um, outputs given over here, that is the extraction… This is basically the verified data, and this is the extraction run that I have.
So you have individual, um, accuracy scores for each of the documents for you to closely control how each sample document is performing under the same
[00:46:00]
extraction prompt. And you have an Analytics tab over here. So you also have the Extracted tab. This is basically where you get to see the extraction run and the output that you have.
And under the Analytics tab, you, uh, you can take a look at the overall metrics of this particular project. So the total number of documents that you’ve processed, the total fields that you’ve retrieved, overall accuracy versus the failed fields, and you also have an error type distribution chart over here.
And another powerful accuracy-enabling capability is the Mismatch
[00:46:30]
Matrix. So what this does is it basically highlights how the extraction has been done for each of the fields across the three or however many of your sample documents that you have. So for instance, over here you can see that this, for this particular field, the extraction has been incorrect in this particular, uh, contract, whereas it has been correct and it’s actually missing, the data is completely missing in the third contract.
So this is the level of detail that you can get to. You get a bird’s eye view of how the same prompt is performing across different samples, um,
[00:47:00]
documents, and this will give you a tighter, um, control of how, uh, you know, your accuracy and how you’re extracting data. So that sums up the various capabilities that you have in Agentic Prompt Studio and how everything from schema generation, prompt ex-, uh, uh, extraction, prompt generation, and, uh, you know, also h-have, you know, to having accuracy enabling capab-capabilities.
All of this is largely automated, and it saves you loads and loads of time. So the final stage over here, even with the Agentic Prompt
[00:47:30]
Studio, is to export this particular project as a tool. And now that you have exported it as a tool, you can deploy it in your workflow and run it as an API deployment, an ETL pipeline, task pipeline, or a human review, uh, human-in-the-loop deployment.
So I spoke to you earlier about the commercial lease a-agreement that we’d seen in the traditional Prompt Studio. So we have an ATL, uh, pipeline set up over here. So you can see this is the workflow. This is where I set up the ETL pipeline, and I’ve basically made
[00:48:00]
configurations. So I’ve configured the Google Drive.
This is basically the input connector or the source connector. So I’m going to be getting this particular commercial lease from a source. So if it is an application, I’ll, I’ll be having an- the app’s details over here. Now, since in this case I’m getting the input contract from, uh, a file system, I have the details of the file system and, uh, if I click on configure, you’ll see the exact folder that this particular, uh, document is coming from.
So once I get this… set up this input source connector, I can
[00:48:30]
also, you know, set up the specific tool that I’ll be using to run on that, on any document that comes from that connector or that source. So I have the Commercial Lease Extraction. This is the tool that I’d explored, exported earlier from the prompt studio.
And once I extract… Once I deploy this particular tool and I extract the data, I will be basically pushing it down this particular, um, database, and I have the details of the database and the table name and all of that given over here. And, uh, this is
[00:49:00]
basically where I can also define human in the loop.
So human in the loop has… I, I told you it has, uh, the option of setting co- complex conditions. So over here I’ve just set it up as 100% of the documents need to go for human review because this is a sample, uh, test case that I am taking. But when you are dealing with real, um, values or, I mean, when you’re dealing with a, a, you know, real production, then in those cases you might want just maybe 12% of your document to go through for human review.
And how do you decide what, which
[00:49:30]
12 person? You’re having so many documents, so how do I decide which of these documents are gonna go? That’s where I have the option of send-, uh, you know, setting up the rules or the conditions. So I can add the rule over here. I can add these rules based on the confidence score.
So let’s say the confidence score is lesser than a certain, uh, value, then th- this particular, let’s say it’s less than .7, then this particular, um, uh, docu- whichever document has this field that is, uh, that has a conference score of less than .7, it’ll
[00:50:00]
be routed for human review. So similarly, I can add the rules over here and I can, you know, choose between the not and, and/or conditions.
So if I want both these, uh, conditions to be true, then I can, you know, go for the end condition that I’ve set up over here. And I can also filter it by value. So let’s say that I want a specific payment term, um for this particular contract, I can set it up over here. And if both these conditions hold true, that particular, uh, contract will be
[00:50:30]
sent for human review.
So this lets you, you know, closely control… Let’s say you have a very important, um, field in your document that you just cannot get wrong, then you can control the extraction or how you route it for review based on the confidence score of the extraction, which is what you’re seeing in the first condition.
And in the second condition, let’s say you have a very important client’s document that you re- definitely need to take a look at manually before you send it down. Then in those cases, you can actually control the conditions by value. And I can also add groups over here. So this is basically it can just,
[00:51:00]
you know, have a very nested structure and can keep going on.
But in this, uh, particular case, I am again going to go back to the 100% of documents that I’m going to route for human review since I just have one document coming in from that source And once I set this up, um, I can just run this particular, uh, workflow, and I can also, like, create, uh, I can schedule this workflow.
So you… I mean, like, uh, since this is an ETL pipeline, you’ll find this under ETL pipeline. So you have various
[00:51:30]
ETL pipelines that are, that are available over here. Let me just search for the commercial lease So you have the details of this particular, uh, ETL pipeline and, uh, I can schedule this particular, uh, pipeline to run periodically and I can edit the, uh, details over here.
Right now it has not been scheduled but I have triggered this one so this is already run, and you also have the various API deployments over here, the task, uh, pipelines over here. And, um, let me actually take you through the human-in-the-loop, uh, workflow because you saw that with the commercial lease
[00:52:00]
ETL, um, pipeline we had actually set up a human review.
So what happens is once your document comes in from the source connector, it gets… The data gets extracted and before it is pushed down into the database it goes through a layer of human review. So that is what we’ll be looking at right now. So this is the review interface. So what I did was you just go, uh, you know, you click on Review HITL over here and once I click on Review it opens up to the review interface where I can search for this particular project.
So I have the Commercial Lease Agreement over
[00:52:30]
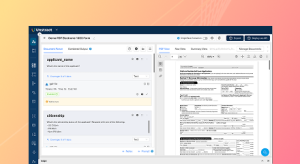
here and I’m going to fetch the, uh, document as well as the extracted values. So you can see this is the document that has come in from the source. It’s the same document you’d seen earlier. And if I click on any of the extracted values, the system automatically highlights where it was extracted from.
So I can check, uh, you know based on, um, each of the– Uh, I mean if… And the system also automatically highlights the output if the confidence score is less than a certain, uh, threshold value. So right now you don’t have the, uh,
[00:53:00]
confidence score highlighted over here since this is a fairly neat, uh, document to read, uh, to extract data from.
But another capability that I can do is I can double click on the extracted output and I can edit it according to my needs. So I’m just gonna remove this, uh, word from here, “The agreement,” and I am gonna click on Save, and this is basically the context that will be… Uh, I mean, this is basically the data that will be pushed into downstream operations.
So once I do this you also have, you know, um, an overall understanding of how
[00:53:30]
many documents are pending for review or review in progress, have com- have been completed, and have been pushed for approval. So another key capability you have with, uh, the review interface or HITL in Unstract is that you can deploy a two, uh, layered review process.
So this is the review, uh, that… The first level of review that is done, and what will happen is this project will then be pushed into another level of review where another, uh, designated person will be able to, uh, take a look at how this review has been done just to have two pairs of
[00:54:00]
eyes on the same, um, you know, review and then it is pushed to downstream operation.
So this is another brilliant way of actually ensuring accuracy again. So I can control who, uh, you know if this… And if, uh, I want this, uh, two layered review or not. So by clicking on Auto Approval For Certain Document Classes or when it is managed by a particular user, I can ensure that, uh, certain documents go into, um Uh, the downstream operations or the, uh, database
[00:54:30]
immediately instead of going through the approval workflow.
So let me just push this for review So now that I’ve done this, I’ll… Let me go into the approver workflow, and you’ll see the same document that is present over there
So over here, I’m going to be searching for the same commercial lease agreement, and I basically have the same document
[00:55:00]
and the output over here. And if you take a look at any, uh, I mean, if you take a look at the, uh, this is basically the, uh, output that we had changed. So you have that output given over here, and again, I can alter this according to my needs.
I just have to double-click it, and I can add the term right back And this is basically what will be pushed into downstream operations. So this is basically how, um, the, uh, review HITL process
[00:55:30]
works in Unstract and that actually brings me to the end of the webinar. So as I mentioned, we take a look at a range of capabilities.
I’ve tried to really cover as many capabilities as I can since contracts do have a lot of challenges as we looked at earlier and you would, uh, you know, need a robust set of capabilities or features to actually handle them. So, um, yeah so we took a look at pre-processing using LLMWhisperer. We took a look at, um
[00:56:00]
We took a look at HITL, chunking and also how to perform, uh, prompt engineering on both the traditional Prompt Studio as well as the Agentic Prompt Studio.
And you also have various features within the platform. For instance, for data enrichment which was one of the challenges that we covered, we have an inbuilt feature called Lookups in the Prompt Studio where you can basically it… Uh, you know, y- uh, again define prompts to perform data enrichment. So we have separate webinars and a lot of material on
[00:56:30]
each of these topics, uh, separately, but in case you’re looking to explore this in more detail and, you know, you’re looking to see how you can adapt these features for your particular business needs then, uh, a common way that we see most of our users go for is signing up for a one-on-one session with one of our experts.
So we’ll be able to sit down with you and understand your needs and see how we can, uh, take this forward and how we can also customize the platform for you. So you will find the link to the free personalized demo
[00:57:00]
given in the, um, chat that you can, uh, take a look at at any time. And that brings us to the Q&A, so, uh, in case we have any questions, we’d be taking them up right now
We’ll be joined by Gokul
[00:57:30]
Okay, it looks like we already have a bunch of questions that have been answered in the Q&A. We’ll just wait for another minute or two so that everybody… I mean, you can answer, I mean, you can ask any questions that you have
[00:58:00]
Thank you Anjan
[00:58:30]
All right, folks. So I think, uh, we’ve already answered all the questions that we had, and thank you so much for joining the session today. We hope you had an insightful session, and we will be sharing this session’s recording shortly. Hope you have a great day. See you in our upcoming events. Bye-bye.
See Unstract in action with walkthroughs of core features and real extraction workflows.
Managed cloud, on-premise, or open-source. Unstract adapts to your infrastructure needs, so choose what works best for you.

Prompt engineering Interface for Document Extraction

Prompt engineering Interface for Document Extraction

Make LLM-extracted data accurate and reliable

Use MCP to integrate Unstract with your existing stack

Control and trust, backed by human verification

Make LLM-extracted data accurate and reliable




Spreadsheet data extraction: Handling multi-tab, multi-format files & more