We use cookies to enhance your browsing experience. By clicking "Accept", you consent to our use of cookies. Read More.

[00:00:00]
Okay, let’s get started. So good day everybody, and thank you so much for joining us today. I’m Mahashree Product Marketing specialist at Unstract, and I’ll be your host for the session in today’s webinar, we are looking at a very document heavy industry. Logistics and supply chain management. Now, this is an industry where we see that even today, documents are still predominantly being produced physically and handled manually.
So this can really slow down processes leading to
[00:00:30]
billing disputes, shipping delays, and even loss of revenue. So over the course of this webinar, we’ll take a look at what are some pressing logistics document processing challenges today. And following that would be a segment on how Untract can pose as a solution.
So this also entails a detailed demo segment where we’ll take a look at some of the key capabilities of Untract and how they help overcome these challenges. And finally we conclude this session with a Q and A
[00:01:00]
where one of our untracked experts will be on air to take any questions that you may have.
Now, before I proceed, here are a few session essentials or housekeeping items. So firstly, this webinar will be in listen only mode, and all attendees will automatically be on mute in case you have any questions, do drop them in the Q and A tab at any time during the session, and our team will be able to get back to you with the answers via text.
Now you can use the chat app to inter introduce yourselves and also
[00:01:30]
interact with fellow attendees. This is also where you could let us know in case you run into any technical glitches during the session. As a final point, when you exit this webinar, you’ll be redirected to a feedback form where I request you to leave a review on so that we can continue to improve our sessions going forward.
So that said, let’s open up this session by covering some of the challenges in logistics document processing. First, there is document volume and variety
[00:02:00]
in logistics and supply chain. We deal with documents at almost every stage of operations, right from the order placement and shipment booking, all the way till final delivery and invoice settlement.
So builds of lading, commercial invoices, packing lists, airway lists, proof of delivery. These are all just a few documents that, um, are predominantly used in these operations, and these documents come in tons of volumes and a range of formats as well. So that means.
[00:02:30]
Your extraction system must be flexible enough to process multiple document types without resorting to custom templates for each variation.
With LLM enabled systems, you can create a single processing layer that basically handles all kinds of documents, whether they are digitally native, scanned copies, handwritten forms, it is able to handle all of these documents in one unified workflow. The second challenge is manual data entry and
[00:03:00]
processing.
Now, studies indicate that over at least over 70% of logistics document operations still remain manual. So this means that there is a person sitting at every stage of your process manually looking at documents and entering the data into systems. Now, of course, this can lead to high error rates and can significantly slow down shipments, which is especially a hassle during peak shipping periods.
So the goal really is to move from manual processes to automated systems with minimal
[00:03:30]
human oversight. Thirdly, we have exception handling. So logistics is also a highly regulated industry. Documents must be complete, match each other and follow rules that can change depending on the country or the trade route.
So exceptions occur when documents or document data does not follow compliance requirements. So this might be a missing tax value or. Code that isn’t filled in. So basically when exceptions occur, they can get really messy and if they’re
[00:04:00]
not caught and fixed at the right time, shipments get delayed and customers can get frustrated.
So lms, LLM based document extraction systems basically make it far more easier to spot these problems rather than look going about it manually. And with a platform like ract, you can automatically flag exceptions and send them through the right review process for a smooth handling. And finally we have integration complexity.
Now
[00:04:30]
document extraction doesn’t work in isolation. It needs to connect smoothly with existing business systems like ERPs, transportation management systems, warehouse management systems, and other operational platforms as well. And data needs to flow in and out of the systems smoothly while maintaining consistency across all the processes.
So this is also, a difficult challenge that. We are looking at today, and we’ll now be moving into how Unstract poses as a solution and how it equips you with the right
[00:05:00]
capabilities to handle all these challenges. Now before I take you to the platform and get started with the demo, I actually wanted to introduce the platform to those of you that are new and with us in this webinar today.
So Untraced is an LLM powered unstructured data ETL platform. And if I had to briefly talk about the capabilities that this platform brings with it, I could put it under three major buckets. So we have the text extraction phase, the development phase, and
[00:05:30]
finally the deployment phase. Now the text extraction is what happens immediately once you upload your documents into the platform.
So this is where you deploy a text extractor tool to extract the raw text from your documents in a format that is LLM ready. Now, Unstract integrates with multiple text extractors, but a popular choice that we see among our users is LLMWhisperer, which is also Unstract’s in-house text extraction tool. So once you basically extract the text from your documents, you
[00:06:00]
are, you can then move on into the development phase where you basically specify to the system using prompts.
What is the data that you’re looking to extract from these documents, and what is the scheme of extraction that you’re going for? So this is done in a prompt engineering environment called Prompt Studio, and with our latest um, updates. We have also released the Agentic Prompt Studio, where you don’t even have to write the prompts anymore.
The system takes care of it all on its own. And we will be looking at the Agentic Prompt Studio as well in this
[00:06:30]
demo. So once you develop the prompts and you’re happy with how to. Your data is being extracted from these documents, you can then now deploy it in any number of ways. So we support, we currently support API deployments, ETL pipelines, task Pipelines, and Human in the Loop deployments natively within the system.
And for advanced use cases, you can also, use Unstract and LLMWhisperer as innate and nodes and as MCP servers as well. Now if I had to throw out a couple of numbers that would give
[00:07:00]
you an idea of where Unstract stands today, we have over 6.1 K stars on GitHub, a thousand plus members Slack, slack community, and we’re currently processing over 10 million pages per month by paid users alone.
So that said, here are the different additions of Unstract and LLMWhisperer. So Unstract is available in three additions. You can use it. , we have an open source offering with limited features, and you can also get the end-to-end, access, the end-to-end capabilities of the
[00:07:30]
platform on the cloud or the on-prem offerings.
LLMWhisperer, again, as I mentioned earlier, is Unstract in-house text extraction tool, and this is also available as a standalone solution. So for LLMWhisperer, we have a, a pretty popular LLMWhisperer playground where you can upload a hundred pages per day for free. And access the end-to-end capabilities of the platform.
So this really gives you the space to, evaluate how the text extractor works for your particular business documents. And this can also be
[00:08:00]
deployed as a, as an API, Python client, JavaScript client, and as I previously mentioned, as Innate and Nodes and NCP server as well. And both the platforms are compliant with all the major regulations.
So that said, we’ll be going, we’ll be taking a look at how Untract actually works in action and how it can help overcome the challenges that we just looked at. We can start with the first challenge that was, um, the document volume and variety. So I
[00:08:30]
spoke about earlier about this single processing layer that can handle multiple document formats and layouts.
So whether you’re dealing with scanned documents and even under scanned documents, you could be having skewed scans, scans with handwritten text, which are scanned with bad, bad lighting. So no matter how your document looks and whether, you’re, you’re going, whether you’re using spreadsheets or digitally native documents, you can basically.
Extract text from all these different documents in a single layer that is LLMWhisperer. And this
[00:09:00]
extracted text is then given or passed on to the lms, which would be deployed to extract the data that you need. So what LLMWhisperer basically does is that it creates these documents in an LLM ready format, and that is basically by preserving the layout of the original document because LLMs.
Understand the context of documents much like humans do. So it is, best that we preserve the layout of the original document and we’ll now move on and take a,
[00:09:30]
, example of a couple of documents and how EL has been able to extract the text. So I’ll take you through some of the, documents that we’ll be looking at today.
So the first document is the airway bill. So, as you can see, this is a scanned document and it has some handed in text as well. Now the reason we need to extract this text, I mean, I can probably pass this document directly to LLMs as well, but
[00:10:00]
what we have seen is that even the most, , even the major models, LLMs are not able to accurately extract the data when documents come in some difficult formats.
For instance, we have a scan document over here with handwritten text, so most of the time we don’t see an accurate extraction, which is why this intermediary layer becomes very important. So now, we’ll, I’ve basically, deployed LLMWhisperer as an API on Postman, and I’ll take you through how this particular document has been
[00:10:30]
extracted.
So if you just have to take a look at this document, we have the shipper details on the top left, ha , left and inside corner. Below that we have the consignee details. Over here you can see some text. And below that you have a table as well with the gross weight, the chargeable weight. The total and all of that.
So take a look at this and we’ll see how the text extraction can be done using LLMWhisperer. So you can see over here that I’ve set up, LLMWhisperer as an API. So first, we’ll have to perform the
[00:11:00]
post call where I upload this particular document, and I can also check the status of this document. Now, I’ve already run these, calls for the want of time in this webinar.
But what you see over here is basically how the data gets extracted. So as you can see, the layout is preserved. We have the shipper name and address. Over here. We have the consignee details below that, and as you had seen, we had some text which was, um, on the right hand side to the consignee details. And below that is also the, um,
[00:11:30]
table that is extracted while preserving the layout.
So you can see how the, , the different values which were handwritten are also extracted. And this is basically the context that will be sent to any LLM of your choice for data extraction.
I’ll go back and we’ll take a look at a couple of different, documents. I just wanted to, give you an overall understanding of different formats. So over here we have a digitally native document. It is a bill of lading, and you also have some radio buttons over here,
[00:12:00]
, which are, filled in. And so you, we again have the shipper and consignee details, some booking number bill of lading number, and we also have a table down here along with some radio buttons.
So let me, let, let’s see how, LLMWhisperer was able to extract this particular, um, the text from this particular document.
All right, so here is the extracted text, and as you can see. We have extracted it,
[00:12:30]
preserving the layout. We have the booking numbers, the bill of lading. Over here on the right, the shipper details followed by the consignee details. And over here you can see that we’ve also extracted the text from the radio button.
So whichever, whichever value is checked, you can see that it, it has been extracted with an X in it. And this is the, um, format in which the LLM will be able to read which of the values have been checked in forms and, different documents.
[00:13:00]
So I have a third document that I wanted to take you through as well, which is a packing list. And as you can see, we have a skewed scan. It’s not oriented properly. And let me take you back to LLMWhisperer. So we’ve uploaded the doc, document over here, and this is the retrieved or the extracted text. So you can see that the orientation is fixed over here while preserving the layout.
So this is basically how LLMWhisperer works on Postman as an API deployment.
[00:13:30]
Now, I also spoke to you about the LLMWhisperer playground where you can upload any, do a hundred pages. . Your part business documents for free and access the end-to-end capabilities. So this is how I’ll be uploading my document. So I can click on upload and I can just choose a document, for me to upload.
So in this case, I’m uploading a nested table just to show you how, um, you know, LLMWhisperer works on tables as well.
So we’ll just
[00:14:00]
wait for a couple of seconds. So this is the cloud version of LLMWhisperer that you’re seeing. And, as you had seen before. LLMWhisperer. , the, playground also comes with its own library of documents that we’ve already, pre uploaded. And, you can also extract basically the rows and columns of tables that you extract with LLMWhisperer.
So you’ll see that with this pre uploaded document. We have also extracted the vertical and horizontal lines, which basically gives the LLM
[00:14:30]
better context in terms of understanding, what the, document is looking to see. So this is also something that can be done. And as you can see over here, we have the extracted text from the document that I had uploaded earlier.
And you can see that in this particular, , document, we have a nested table. So we have two different tables in one particular cell of a parent table, and you can see that the layouts have been preserved perfectly well over here, right from the indentation and everything. So that basically
[00:15:00]
covers how, you can create a single processing layer for extracting text from any document format.
And we looked at multiple formats over here. Now let me go back to the slide and, slide deck and we’ll be, going, we’ll be moving forward to the next feature that I wanted to cover, which is basically a way, of overcoming manual data entry, which is still very predominantly present in, um, logistics and supply chain management.
. So. Over here. I, I
[00:15:30]
am going to be venturing into the prompt engineering, space that we’ve spoken about in the development phase of Untract. So we’ll also be taking a look at Agentic Prompt Studio, which basically gives you a jumpstart in prompt engineering because when you get started with prompt engineering, there are three key aspects to it.
So firstly, you’ll have to define the schema of your output. So what is the data that you’re looking to extract and what output, schema and format. Secondly, the prompt generation itself.
[00:16:00]
So you’ll, you’ve gotta write your prompts, accounting for all the missing data, the different variations that you could have in documents.
So, the more detailed you make your prompt, it needs to really work across multiple document variance that your business, um, would be incurring. And thirdly. You would also require, you’re also required to verify the output data, the extracted data, and make sure that it is accurate. So these are the three key, um, aspects of prompt engineering, schema definition, prompt generation, and, um, extraction
[00:16:30]
accuracy and verifying whether it is correct.
And you can see how with the Agentic Prompt Studio, we are able, the system is able to offload that, um, weight off your shoulders, and it is able to take on the heavy lifting because with this. System, you can automatically create schemas, define detailed prompts, as well as perform multiple, as well as get access to multiple tools that help you, you know, verify your extracted output and see how good your accuracy is.
So let me go back
[00:17:00]
to the platform and I’ll take you through, um, how prompt engineering can be done in abstract.
So, what you see over here, folks, is the Unstract interface. And if I were signing in for the first time, what I’d have to do is set up a certain prerequisite connectors. So these are certain connectors that I would be required to run any document extraction on the platform. So, this is an element
[00:17:30]
enabled, , platform.
So you have a couple of popular elements for you to integrate with. And you would have to integrate with vector DB’s, embedding models, as well as text extractors. So over here is again where you would find LLMWhisperer along with other competitors. So once you integrate with the relevant connectors, you are good to go and you can get started with prompt generation.
I mean, prompt engineering. So firstly, I’ll be taking you through the agent tech prompt studio and we’ll actually be uploading a document and seeing,
[00:18:00]
, how this system is able to automatically generate the schema and the prompts. So over here I’m gonna be creating a new project, and in this project we are, basically going to be extracting some data from the airway bill that we looked at earlier, which was the handwritten, form that was scanned.
So once I create the project in Studio, this is how the Agent Prompt Studio interface looks. So firstly, I’ll have to. Um, set the different
[00:18:30]
elements that are going to be working on this particular project. So over here it gives me, it allows me to choose different elements for different operations. So I could, choose a separate extractor, LLM that just runs the extraction prompts on documents.
I could use an agent lm, which basically is used for the schema generation and prompt generation. So this gives me better control. , over the, cost aspect or over what, LLM model would be better suited for different operations. So once I set
[00:19:00]
up the connectors and I, over here, I set up the LLMwhisperer, which is a text extraction connector that I want.
I’m going to save these changes, and now I can upload the documents that I want to extract data from.
So over here I’m uploading the same document that you looked at earlier,
and we have the document right here. So, as I mentioned
[00:19:30]
earlier, the first step in, prompt engineering is to extract the raw text from your document. So I’m going to basically click on this and extract the raw text.
And I can upload multiple documents as well. So we have uploaded one document over here and let me just upload another document. So this is another airway bill
and I’m going to extract, the raw text for both. So you can see that the raw text has already been
[00:20:00]
extracted for the first one that we uploaded. So this is basically how it looks. This is the context that is going to be sent to the LLM for data extraction.
All right. So, um, the, the raw text is now available for both the documents and we can now get started by, with the schema generation. So the schema generation is, again, it, it works with three agent tech, pipelines. Under this, the
[00:20:30] summarizer agent is, just a minute, folks, I’ll just refresh this.
So firstly, what we’ll have to do is enable the summarizer agent, which basically reviews the uploaded documents individually and it identifies the different, field names, the data types, the descriptions of those data types, of those data fields from the document. So we can, we should first, um, enable the summary agent, which would produce a summary of this
[00:21:00]
particular document highlighting all the important fields.
So here’s the summary that, the system has produced for the, airway bill that we’d uploaded first. So you
[00:21:30]
can see that it has basically retrieved the important data items from across the document. And not only that, you also have a description of what each of these fields represent. What, are their data types, as well as example values.
So this gives the system a detailed understanding of what this particular document entail. And the same is true with the other document that we had uploaded as well.
[00:22:00]
So what happens is once you extract the summary from all the documents that you’ve uploaded, you can generate a unified schema. So the unified schema basically puts together all the summaries of the uploaded documents and it. Creates, it basically accounts for all the variations in terms of formats. It normalizes the field, so for instance, that way your date is represented in, in both.
The documents could be different. One could follow the date first, followed by the month format, or one could have the month first, followed by the date [00:22:30] format. So there are certain, differences in the, and variations in the, in which the same data could be represented across multiple documents. So what the schema generation does is that it goes through all the summaries and it basically normalizes fields.
It determines data types and also identifies nested structures. So that gives you a unified schema of, um, all the data that you’re looking to extract from across different document variations that you might have uploaded into this particular. Project,
[00:23:00]
so we’ll give it some time for it to extract the schema.
Meanwhile, I thought I could show you how this looks. I’ve, I’ve already automatically generated the schema and prompts for another document, so let me just take you through that. So we have the credit cards, um, extraction project over here. So this is not inevitable. We are dealing with credit card statements and I’ve basically run the entire project and I’ve extracted some data.
So what you’re, what you could, be expecting out of these, output that, um, we had just run
[00:23:30]
for schema generation is a unified schema like this. So you have all the different fields and , similarly you have the name of the field, the description, the example, as well as the data type as well. But the difference over here is that this isn’t the summary of just one document.
You have the summary of all the documents put together and with normalized values and, with the data structured properly for the output.
All right,
[00:24:00]
so here’s the schema for the airway bill. It has analyzed both the documents, both the airway bills that I’ve uploaded and has generated a unified schema. Now, the schema is also editable and , but we’re not gonna be editing it over here. That is also another option that you have. Lemme create the prompt.
Lemme automatically generate the prompt. So this prompt is basically generated using the schema that, it had, the system had given, us and this. Is an automatically generated prompt that accounts for
[00:24:30]
all the data fields that is contained in the, schema. And it constructs a comprehensive seven section prompt with various aspects like the system role, the schema, embedding, formatting rules, output format, specifications, and how to identify disambiguation.
So you have all these accounted for. And, um, the prompt really gives you a jumpstart because this could actually take businesses days. To go through multiple document variations and write a prompt that would account for all these variations.
[00:25:00]
So, we’ll see how the prompt is going to be automatically generated over here.
And if I have to give you an idea of this. Let me go through the extraction prompt that, for the credit card project. So as you can see, what happened over here is that the system basically analyzed the unif, unified schema that you’d seen earlier, and it was able to generate, generate this detailed prompt.
So you can see that you have multiple instructions, the output schema over here. What are the required values that you absolutely need
[00:25:30]
along with the output data type? And you have various other information over here as well. So you have, um, how to format the output. What are some sample examples? How do, how do the sample examples look?
And this is, this is for all the fields of extraction. So this is basically what you, you know, you arrive within, within just a few minutes and, you don’t have to go through all the test documents manually to create the prompts, accounting for different variations.
[00:26:00]
All right. We’ll give it a couple of minutes for it to load. So I’ll just continue explaining the agent tech prompt studio, with the credit card statement project itself, because it might take a couple of minutes and we’d be running out of time. So what happens is once you extract the schema and then you extract the prompt, you’ve also got to create a verified data, dataset.
So what this basically does is that it
[00:26:30]
runs the extraction prompt on the document and it extracts an initial set of. Output values. So these values that you see over here, the website is american express.com. What is the card type? The purchases, the new balance. So all these values are from, are extracted from this particular document that you see over here on the right.
So this creates the verified data set, which can also be editable. So what you could do to ensure the accuracy of your extraction is that once this extraction is done,
[00:27:00]
first, you can manually. Verify if the extraction has been correct and create a golden set or the verified data set because we, we prompts evolve and we will be making changes to the prompts as time goes, and we’ll be adding new details.
But whenever a prompt is versioned or you create a different version of the prompt. It’s important to ensure that the existing extractions are not altered or they don’t, they’re not extracted incorrectly. So in order to control that, what you can do is once you perform the
[00:27:30]
extraction, you can spend some time, manually verifying whether the extraction output is correct, and this set becomes the.
Standard for which the subsequent extractions after altering the prompts could be, um, judged against. So you would be comparing the extractions of the subsequent, um, I mean, once you make changes in case you’re making changes to the prompts, you will be comparing the following extractions with this verified data just to ensure that none of the extractions are incorrect.
[00:28:00]
So that is what, you have over here. So, firstly following, the first extraction, you will be creating the verified data. And again, the extraction prompt is also editable, so you can see over here that, and you can store the edit different versions that you’ve created of this prompt. So over here you can see that I’ve, I’m current.
What we are currently looking at is version two of this prompt. And when I click on history, we have two different versions. So you can also compare these two different versions. Um. To see how
[00:28:30]
different they are. So you can see over here how version two compares to version one, and you can perform this with multiple versions of your prompt as well.
So this gives you better, a better way of handling your prompts and also keeping account of how you’ve been altering them. So once I make my changes and I’m happy with the extraction, I can click on the extraction for all the. Um, documents uploaded over here, and you would be able to look at the individual extraction of all these documents and the output as well.
[00:29:00]
So this is how the Agentic Prompt Studio really helps you automate schema definition and prompt creation within a few minutes. So if I just go over here, you can see that the extraction prompt for the airway bill has been generated and we have a pretty lengthy prompt over here for me to get started with.
So just, to complete rest of the explanation with the credit card statement project itself. So once this is done, the, um, and once I extract my, so with every prompt version that I
[00:29:30]
create, I can, run multiple extractions of data from these doc documents that are uploaded, and I can compare it with a verified data set.
And the , system also gives me an understanding of what is the accuracy percentage of the project. So we have an overall accuracy percentage over here, and also individual accuracy percentages for each of the documents. So when I click on this, you can basically compare how, the difference in extraction.
Off the verified set
[00:30:00]
versus the extracted output, you can see where it goes wrong. So I have the verified set on one side and the extracted output on the other side, and you can see where it has gone wrong. And, the scroll over here on the right also highlights the exact area. So I can just easily scroll, scroll towards to those areas and I can easily look at, what are the exact error points.
, it really helps me drill down into the mismatched fields. So apart from this, there is also an analytics tab, which gives you, um, some common, some
[00:30:30]
important metrics like the total fields extracted, the overall accuracy, the number of failed fields, and you also have a mismatch metrics to give you a visual guide on how the extraction is performed.
So earlier what would happen is. , when we extract data from, documents, the same prompt isn’t going to work for all the documents. So, so as you can see over here, this metric gives me an overview. So, if you can see the page number field has been extracted accurately in.
[00:31:00]
The first and third credit card statements, whereas it is inaccurate in the second one.
So this was a problem, which was earlier, very difficult to spot without a tool like the mismatch metrics. But right now I can easily spot these exact fields that are a mismatch with, because it gives me a very visual, view and I can easily drill down into these fields and check out what they are. And, so I just have to click on that particular, um, cell and I, I’m immediately taken to what is the.
Extraction over here, and I can get,
[00:31:30]
, I can get started with correcting that. So you have different color, color codes to highlight a perfectly, extracted data versus a mismatch. And a yellow would be for a partial match in the extraction output. So that basically sums up the agentic prompt studio.
So we looked at the automatic generation of schema, the automatic generation of prompts, both of which are editable. And you also have the verified data set for you to, um, keep a standard of your extraction
[00:32:00]
outputs. And you have multiple ways of keeping track of your accuracy as well. So the final step over here would be to export this project, and I can get started with deploying it in multiple ways, whichever suits my business.
Now we’re also working on self-improving models for the Agentic Prompt Studio. So this is what you can expect Next, it cons. So it basically considers the extraction accuracy as feedback and can automatically start fine tuning the prompts to improve as , results. So this is a way of, um, you know, completely
[00:32:30]
removing the human outta the system, or at least minimizing contact, and the prompts itself are self-improving.
So this is what you can expect next. So, folks, we looked at how the agent tick prom studio works, and if I have to quickly take you through, the gen, the traditional prom studio as well. So the agentic prompt studio could be, suitable for large use cases. But let’s say that there is a document and I’m just looking to extract one or two details from it.
Then I can go for the traditional prompt studio where I don’t need an elaborate,
[00:33:00]
prompt. So I, as you can see, I’ve given these prompts manually, and I have the same document uploaded over here, and you, I, I can also define the output data type. So what happens is once I run these prompts, the data is extracted in the format that I require.
And, um, this is also adaptive in nature. For instance, over here you can see that we have a prompt, which is basically extracting the goods shipped as in, a JSON array. So the goods shipped are right here. So we, we are getting the name of the goods as well as the
[00:33:30]
quantity and the HS code. But if you look at the document, you can see that only the name and the quantity are.
Given in the document, whereas the HS code is not at all given in the document. So where is this output, of the HS code even coming from? So what this is, again, a way of tackling the integration complexity challenge that we looked at earlier, where your document extraction system should be able to communicate with other business systems within, your, infrastructure.
So what happens
[00:34:00]
over here, folks, is that we basically send the extracted output. To a post-processing web hook. So this web hook basically runs the extracted goods against a database or a file, which could have the HS codes corresponding to these goods, and it sends it back to the system and it is, updated right here.
So this is also another capability which makes your prompts easier to maintain and also helps you. Stay consistent with your data so you don’t have to
[00:34:30]
create a separate process for it. It is supported inside the extraction system itself. So the post-processing webhook is just one, adapt one of the adaptive capabilities that we have.
You can also, explore the custom data parata for dynamic inputs and also prompt chaining, but we wouldn’t be going into too much detail on that over here in this webinar. So with that, folks, we, we’ve taken a look at how, prompt engineering and also the agent prompt Studio can really help overcome manual,
[00:35:00]
document processing in logistics.
Now moving on to the next challenge, we had taken a look at how exceptions are quite common in logistics. So you basically have to, route these exceptions to the right channels and handle them without missing out on any. So that is where the human in the loop capability supported by the platform comes into the picture.
So with human in the loop, what you can do is if you are processing mul a huge volume of documents. Exceptions arise in just a few. You can
[00:35:30]
set those conditions for exceptions as , conditions within the platform itself. And once the system identifies these data items that fall out of these conditions, it is immediately flagged for a human review.
And Unstract also supports a pretty comprehensive, review interface where you can perform source document highlighting, and you can also edit the extracted output within the interface itself before you send it forward to downstream operations. So this. Wouldn’t be done for all the documents. , this helps you focus
[00:36:00]
once you set the co , conditions, it helps you focus just on the high risk or the high value documents for human review.
So now let me go back to the platform and I’ll take you through how this can be done. So firstly, I am going to show you how the same, I mean the same airway bill, project that you’d seen earlier. Can be deployed as an ETL pipeline. So as you can see over here in this workflow, we are basically getting the document from a file system that is Google Drive.
We are processing it
[00:36:30]
using the aw, basically the project, the tool that, which was exported from the project that we just looked at, and we are sending the extracted output. A destination database. But before we send that output, I want to check for exceptions and conditions. So that’s where the human in the loop capability comes into the picture.
So firstly over here, here’s where you set the conditions for human in the loop. So in the, I can set up, you know, how, what is a percentage of my total document influx? Do I want to send for human the loop? And then I can go on to
[00:37:00]
specifying certain rules that, that, would classify a document for.
Human review. So over here I could, I could filter by confidence. So let’s say that the shipper details, if the shipper details have a confidence score that is less than 0.6, then I want that particular document to go for human in the here. So I can also filter by value. So let’s say that the shipper details and um.
If I want the name, if the name is a
[00:37:30]
particular shipper, then I want that part, that particular document to go in for human in the loop. And, you can also add rules by groups. So over here we have a collect, , a rule collection, and we have another one so you can compare. So either if your condition follows the rules within this group, and, and you can also set the and or, or logic.
So, um, if I set it to, or then if the, document for of. Satisfies the conditions within this group or the second group. If
[00:38:00]
either of these groups hold true, then the document is sent for human review. So you can really go down into, um, complex conditions and set it exactly according to your business requirements.
But for the want of time, I’ve already run this workflow and I will be taking you through the, um, human review interface now.
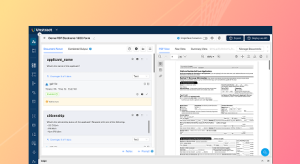
So this is basically how the review interface looks. I can search for the document class, which I want to, um, you know, perform the review on.
[00:38:30]
And once I fetch this, you can see that the extracted output is given on the right hand side alongside the document on the left hand side. And the system also automatically highlights the, um, certain.
Extracted output where there is a low confidence score of extraction. So you can, this helps you identify what are the important areas that you might want to take a look at. And for instance, if I just click on this particular data, the system also automatically highlights where that particular data
[00:39:00]
was fetched from, from the original document.
So not only this, I can also, edit the value. So, let’s say I don’t want this to be Bristol and let’s say I’m going to edit this as London, so I just, if there is in line editing available and I can edit this. And basically this is the output that would be sent into the, downstream operations. So once I have performed the, I can pass this document.
For the next set of processes. And I can also look at the queue details over here. So this queue details
[00:39:30]
gives me an idea of what are the number of documents that are pending for review, which are review in progress. And, um, this, the human in the loop, , capability and abstract also supports multiple rev , review layers so you can.
, deploy two people, the reviewer as well as the approver to go through the extracted outputs. And, that is what we’ll be looking at now. So once I finish the review,
it would move into the approver workflow. So
[00:40:00]
now whoever is the approver, or if I have the approver access, I can just sign in and, fetch this document. And as you can see, the whatever changes that the reviewer had made on the document is, sent to the approver as well. So you had seen that we had changed the city from Bristol to London, and that change is reflected over here.
So again, the approver has the same control, so you can click on any output, for it, for the system to, you know, highlight the place where that, particular output was fetched
[00:40:30]
from on the original document as well as I can. Um. I can change details with inline editing as well. So once the approver, is happy with this, they can click on approve and this document would go into the relevant destination DB that I’d set in my workflow.
Now, in case you are, you do not want, a two layer review. You can also go for auto approval workflows where I can classify certain documents. So over here all the documents you see on all the document classes that you see on the right are classified
[00:41:00]
are, are sent for auto approval, which means that they do not, these.
Particular documents do not go through a second layer of review at all. And this can also be done based on the users. So there could be a user where you do not want, to send that whichever document that user incurs to a second layer of review at all. So you can set all of this over here, and in many cases.
Businesses process documents in packets, and you might be receiving financial packets or even packets in logistics. So when that happens, you might
[00:41:30]
want to review all the documents together in a single go without, going through each of these documents individually. So that is also available in where you can review packets together in, the human in the loop workflow and abstract.
So now coming back to this, let me just send that particular document for approval and that would complete the workflow. So once the approval goes through this, you just have to click on approve and. That’s it. Your document would be sent into the
[00:42:00]
relevant destination DB or whatever downstream operations you had configured.
So this is how you can smoothly handle exceptions using the platform. And now finally coming to the, integration with other systems. So untraced. It, it’s very important for any extraction system to be able to connect with multiple systems that the platform will be using. So over here, even, in Unstract, we, um, offer multiple connectivity as well as deployment options.
So
[00:42:30]
these are some of the tools that Unstract can connect with. So usually we have documents coming in from various file systems. So we, these are the file systems that the app. Natively connects with, or you can also use the API deployment to connect with, specific applications of your own. So over here we have Google Drive, Dropbox, and , in the databases we have Snowflake, Postgres, sql, and , BigQuery.
So there are a couple of databases that we natively connect with as well. So this is especially useful when you are
[00:43:00]
deploying, . ETL pipeline where you basically, which was the example that we looked at just a while ago, where you get the document from a file system and then you process it and then you send the output to a destination db.
Or it could be a task pipeline where you get the incoming document from a file system, you process it using a, a prompt studio tool, and then you send the output or the extracted data. Another file system. So these are the natively supported file systems that we connect with. And, we had also taken a look at the ETL,
[00:43:30]
, workflow just a while ago.
So you can also deploy, your pro studio projects as an API as well. And we had taken a look at the Human in the Loop deployment as well. So, earlier I’d mentioned N eight in workflows. So Unstract as well as LLM Whisperer are available as community nodes on a and you can, configure these workflows as well.
So this is just an example of how this works, but we do have elaborate webinars on innate and, these particular deployment options as well that you can check
[00:44:00]
out. So for the want of time, I’m just going to be going onto the next slide over here where, um, you can see how Unstuck works as an MCP server as well.
So, over here, I’ve just entered a prompt to perform a particular operation and, the MCP server has been able to take, charge of this. So we have the Unstract tool that you can inspect, um, and look at the details as to how the extracted output looks or the extracted text looks. So that is what you’re seeing over here.
And finally, once I extract the text, I
[00:44:30]
can basically take this data and give a couple of more instructions for it to pros, you know, perform the downstream operations. So that said, there is a final, um, cap , before the closing note, I wanted to bring your attention to another interesting capability that could be useful, especially for the logistics audience because we do support an API hub where basically we have ready-made, plug and play APIs for.
Common document types. So,
[00:45:00]
at least three of these APIs, the bill of lading, the invoice extraction, API and the purchase order API could be useful, extremely useful for logistics. So I’ll just be taking you through the bill of lading. So what this API does is that you do not have to go through the development phase at all, which means you don’t even have to go into the agent to prompt studio phase.
All you have to do is take this API, plug it into your workflow. And this API is already designed to extract all the key. Data items from Build of Lading. So these, it’s, it’s a pretty, extensive list of data that you’re going
[00:45:30]
to be extracting. And, you also get an idea of how the API response looks.
So you can download the Postman Collection for this, API, and you can try it out on the playground as well. We also have certain sample results over here. So you, you have a bill of lading and you can see that you can download the results as a JSON or a TSV file. So you can do this, you can try it out for your particular, business documents.
And, um, this really cuts down, cuts short on the time and productivity. And, um, our team also, you don’t have to repeatedly come
[00:46:00]
back and maintain the API as well because that is on the team, so we have certain others. APIs available currently as well. So you can take a look at that. And there are two utility APIs.
So the PDF Splitter API basically splits individual PDFs from PDF bundles or PDF packets that you might be receiving. There is the all table extractor that just retrieves the , tables from the documents that you receive. So this is also something that might be, pretty useful for the logistics and supply chain
[00:46:30]
management audience.
So that with that, we arrive at the closing note for this particular webinar. So I really tried to condense all the features that could help overcome the initial challenges that we had looked at, like the document variety and format. , the secondly was overcoming manual operations, thirdly, handling exceptions, and finally connecting with.
Existing business systems. So we looked at a bunch of capabilities and um, I’ve tried to wrap it up in this session.
[00:47:00]
However, if you are looking to see how this fits into your specific use cases, and, there are also some other capabilities, like for instance, if you are dealing with documents that run hundreds of pages long, you might want to.
Perform chunking on those documents, which is also a capability that we have in Unstract, but I haven’t been able to cover that, for the want of time. So if you want to explore the platform better, then um, a common channel we, see webinar users, I mean webinar attendees take is that you could register for a
[00:47:30]
one-on-one demo with one of our experts and we’ll be able to sit with you and understand your needs, see how the platform can be tailored to your business and we can take the discussion forward.
So, um, the links. To the, demo, um, demo booking as well as the free trial of the product and other relevant links should be in the chat and, you could take a look at them. So we’ll now be getting into the Q and A in case you have any questions.
[00:48:00]
Okay. I’ll just wait for a minute or two.
[00:48:30]
I think there is a question in chat.
[00:49:00]
All right. We have, shared the links again, so you can take a look at that. Alright folks, so thank you so much for joining the session and hope you, had an insightful session and I really look forward to seeing you at our upcoming events. Thank you so much.
We use cookies to enhance your browsing experience. By clicking "Accept", you consent to our use of cookies. Read More.
See Unstract in action with walkthroughs of core features and real extraction workflows.
Managed cloud, on-premise, or open-source. Unstract adapts to your infrastructure needs, so choose what works best for you.

Prompt engineering Interface for Document Extraction

Make LLM-extracted data accurate and reliable

Use MCP to integrate Unstract with your existing stack

Control and trust, backed by human verification

Make LLM-extracted data accurate and reliable